Introduction
This is a continuation from Part 1.
Prerequisites
To get started with testing, first install the package below:
yarn add @faker-js/faker
@faker-js/faker helps us generate massive amounts of fake (but realistic) data for testing. Check out the guide for faker here.
Write tests for props
For test files, I like to separate them in a folder so that it's less cluttered when viewing the main files. Create a new folder named __tests__ under the src/components. This is where we will put the test files for the components under the src/components folder.
Since we are writing tests for the OtpInput component, create a file under src/components/__tests__ and name it OtpInput.test.tsx. This is a common naming convention for test files, make sure it matches the name of the component you are testing.
Then let's add in the structure of the test:
import OtpInput, { Props } from '../OtpInput';

describe('<OtpInput />', () => {});
Aside from importing the component that we will test, we also imported the type Props. You'll get to know why we did that later on.
describe is one of Jest's global functions, so with the setup of Create React App, we don't need to specifically import these global functions in our code, we can just directly use them. describe creates a block that groups together several related tests. So ideally the description should be describing what we are testing, so in this case I used the component name. Feel free to rename it according to your preference.
Next we can add a test case inside the describe block:
import OtpInput, { Props } from '../OtpInput';

describe('<OtpInput />', () => {
  it('should accept value & valueLength props', () => {});
});
The it (or test) method is another global function by Jest that runs a test. This is where we can have different test cases. Let's start to populate our first test case. First you want to create a reusable function renderComponent inside the describe block, it should accept the props of our component as an argument and call the render() method from Testing Library to render our component with the passed props in a test environment.
import { render } from '@testing-library/react';
import OtpInput, { Props } from '../OtpInput';

describe('<OtpInput />', () => {
  const renderComponent = (props: Props) => render(<OtpInput {...props} />);

  it('should accept value & valueLength props', () => {});
});
Since we'll be having multiple test cases for this component, creating a reusable function to render the component will reduce the code duplication. This will also make it easier if ever next time you have to rename your component. Since we can just change it within these lines and not in multiple separate lines.
Now, before we can render our component using the reusable function we need to provide the required props for it. This is where we use faker to generate random data for us. We need digits only so we can generate a random number then convert it into a string as value prop. It can be from 0 to 999999 which randomly generates a 1-digit code to a 6-digit code. For valueLength, we just use the length from the generated value prop.
How about onChange prop? We can actually just pass our own simple function but it would be better to create a mock function using jest.fn() which allows us to capture the calls of it amongst other things you could do. To know more about mock functions and what you can do with it, you can read more here.
Here's the following changes to the code:
...
import { faker } from '@faker-js/faker';

describe('<OtpInput />', () => {
  ...

  it('should accept value & valueLength props', () => {
    const value = faker.datatype.number({ min: 0, max: 999999 }).toString();
    const valueLength = value.length;

    renderComponent({
      value,
      valueLength,
      onChange: jest.fn(),
    });
  });
});
So after rendering the component, we need to do our checks afterwards. We basically can check that the number of input boxes is the same as the valueLength. To query all the input boxes, it is advisable to use screen methods from Testing Library, and in our case we can use .queryAllByRole('textbox'), which returns an array of elements that have textbox as the role. To learn more about queries in the Testing Library, you can go here.
...
import { render, screen } from '@testing-library/react';

describe('<OtpInput />', () => {
  ...

  it('should accept value & valueLength props', () => {
    ...

    renderComponent({
      value,
      valueLength,
      onChange: jest.fn(),
    });

    const inputEls = screen.queryAllByRole('textbox');
  });
});
Okay, now we have an array of input elements. It is now possible to do the checks by executing one of Jest's global functions called the expect() method and pass the element or elements returned by the query, and run what we call a matcher method .toHaveLength() which checks the length of the array is equal to the argument passed. This is one of the matcher methods provided by the jest library. While you can check this documentation for the custom matcher methods which are specific to the DOM.
...

describe('<OtpInput />', () => {
  ...

  it('should accept value & valueLength props', () => {
    ...

    renderComponent({
      value,
      valueLength,
      onChange: jest.fn(),
    });

    const inputEls = screen.queryAllByRole('textbox');

    expect(inputEls).toHaveLength(valueLength);
  });
});
And we just wrote our first test case! Save your changes and let's verify if this test case did pass or not. In your terminal, run the following command:
yarn test --coverage
The --coverage parameter will show you how many percentages you have covered in each file of your project and/or if you have missed any line to test. Once the command ran successfully, the terminal should display something like this:
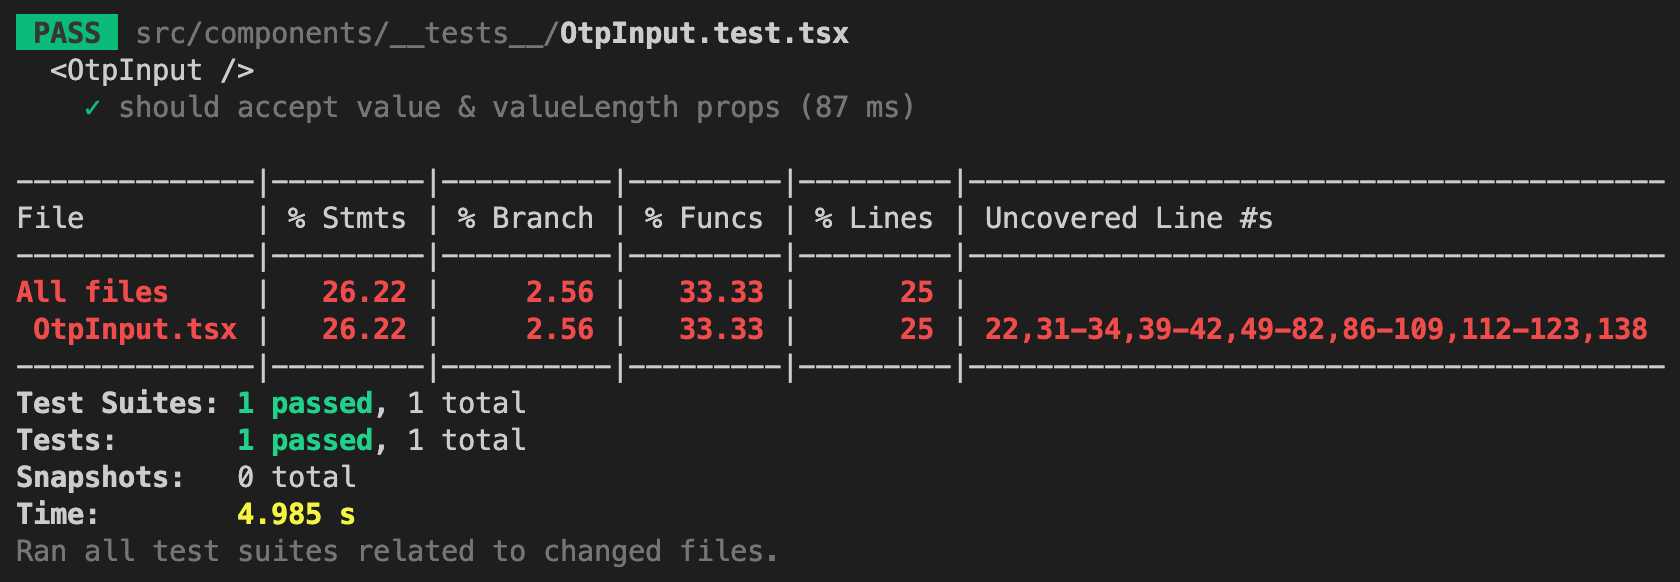
It did pass! So in the first test case, we can actually do another check to make it more robust and trustworthy. Remember we passed the value prop which contains a string of random digits? We can actually check that the input boxes contain each digit per box based on their position in the string. In this case, we can convert the generated value string into an array. Then loop through the input elements array which gives us access to the individual input element along with its index idx, then check from the valueArray array using the idx if it is the same value inside the input element. To check the input element value in the expect() method, we can use the custom matcher method .toHaveValue(). With this understanding, update the code with the following below:
...

describe('<OtpInput />', () => {
  ...

  it('should accept value & valueLength props', () => {
    const value = faker.datatype.number({ min: 0, max: 999999 }).toString();
    const valueArray = value.split('');
    const valueLength = value.length;

    ...

    expect(inputEls).toHaveLength(valueLength);

    inputEls.forEach((inputEl, idx) => {
      expect(inputEl).toHaveValue(valueArray[idx]);
    });
  });
});
And, our first test should still pass. Let's move on to the next test case.
Write tests to allow typing of digits
Next test case would be to check when we type digits it should trigger the onChange function from the props and also focus on the next input element. If there's no next input element, the focus should remain on the current element.
We can use the fireEvent method which is also from the Testing Library to trigger DOM events in the test environment. To fire other DOM events, you can check out the documentation. First argument it accepts is the element you want the event to get fired to while optionally, you can pass a second argument to provide event data or details related to the event such as target object which is what we'll be doing.
Here's the code for the second test case:
import { fireEvent, render, screen } from '@testing-library/react';
...

describe('<OtpInput />', () => {
  ...

  it('should allow typing of digits', () => {
    const valueLength = faker.datatype.number({ min: 2, max: 6 }); // random number from 2-6 (minimum 2 so it can focus on the next input)
    const onChange = jest.fn();

    renderComponent({
      valueLength,
      onChange,
      value: '', // keep the value prop empty to trigger the change event
    });

    const inputEls = screen.queryAllByRole('textbox');

    expect(inputEls).toHaveLength(valueLength);

    inputEls.forEach((inputEl, idx) => {
      const digit = faker.datatype.number({ min: 0, max: 9 }).toString(); // random number from 0-9, typing of digits is 1 by 1

      // trigger a change event
      fireEvent.change(inputEl, {
        target: { value: digit }, // pass it as the target.value in the event data
      });

      // custom matcher to check that "onChange" function was called with the same digit
      expect(onChange).toBeCalledTimes(1);
      expect(onChange).toBeCalledWith(digit);

      // custom matcher to check that the focus is on the next input
      // OR
      // focus is on the current input if next input doesn't exist
      const inputFocused = inputEls[idx + 1] || inputEl;

      expect(inputFocused).toHaveFocus();

      onChange.mockReset(); // resets the call times for the next iteration of the loop
    });
  });
});
I hope the comments helped in explaining the new codes.
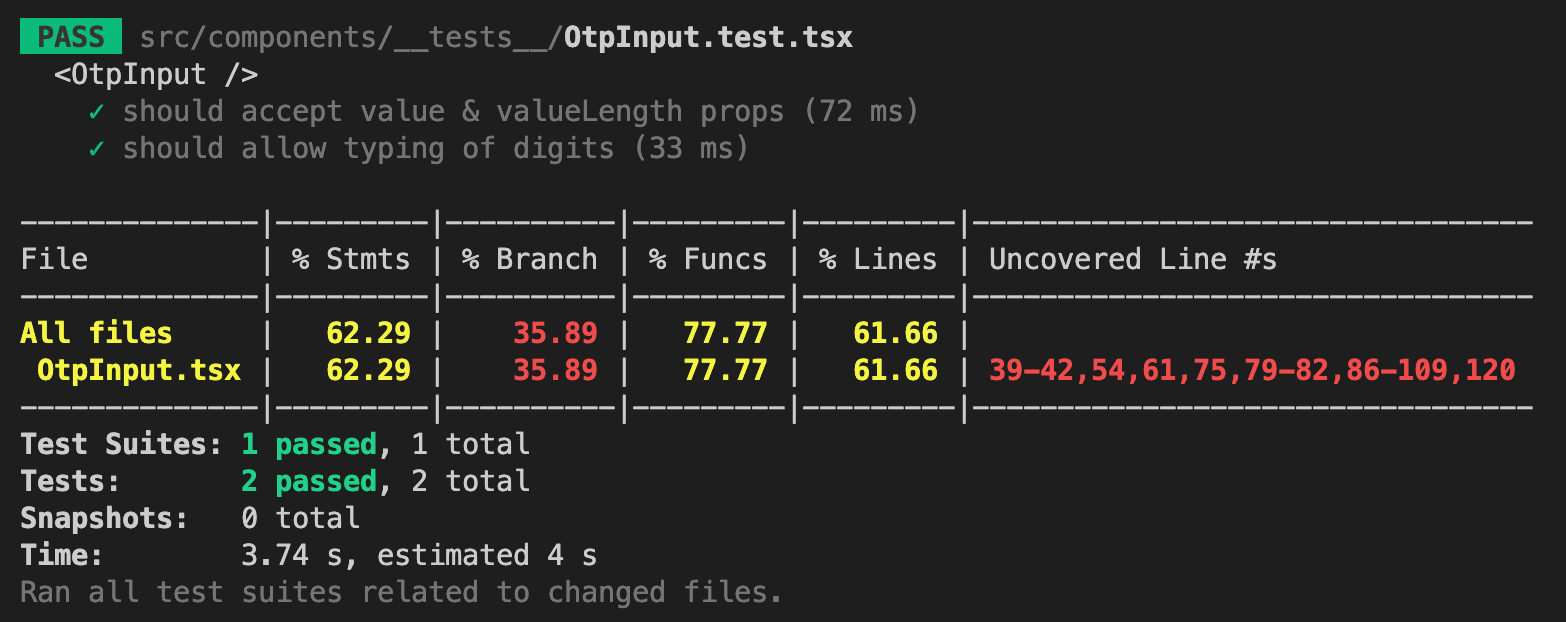
Alright, save the changes above and check your terminal, the coverage now should look like this:
Write tests to not allow typing of non-digits
Alright, now since we allow typing of digits in the input boxes, we should also check that we are not allowing typing of non-digits in the input boxes. The code for this test case would look similar to our previous test case with minor changes, here it is:
...

describe('<OtpInput />', () => {
  ...

  it('should NOT allow typing of non-digits', () => {
    const valueLength = faker.datatype.number({ min: 2, max: 6 });
    const onChange = jest.fn();

    renderComponent({
      valueLength,
      onChange,
      value: '',
    });

    const inputEls = screen.queryAllByRole('textbox');

    expect(inputEls).toHaveLength(valueLength);

    inputEls.forEach((inputEl) => {
      const nonDigit = faker.random.alpha(1);

      fireEvent.change(inputEl, {
        target: { value: nonDigit },
      });

      expect(onChange).not.toBeCalled();

      onChange.mockReset();
    });
  });
});
As you can see here, we generated a random alphabet character and used that as the value on the change event. onChange mock function shouldn't be called because we are not supposed to do anything if the text is not a digit.
Save your changes and let's verify this test case:
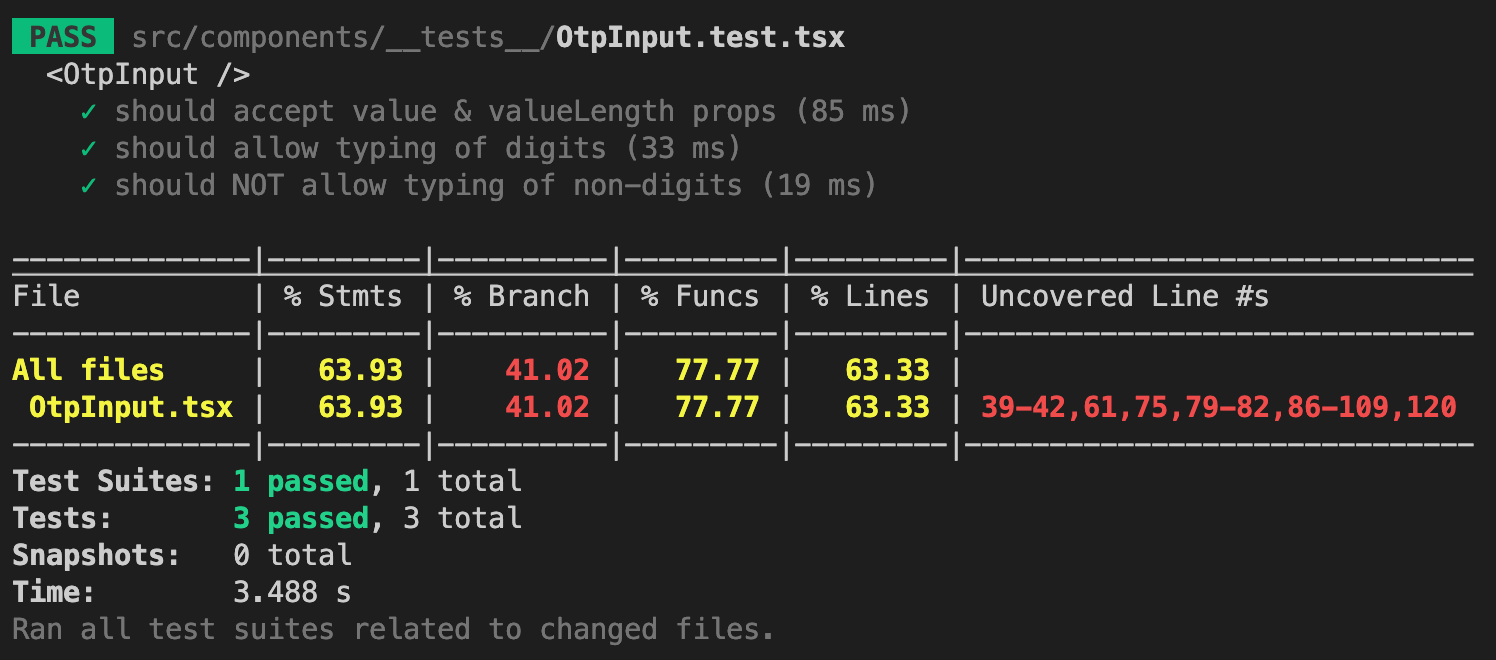
And the test case passes. Great!
Write tests to allow deleting of digits (focus on previous element)
Now it's time to write tests when we're deleting digits from the input boxes. The logic there is that when we delete the digit from an input box, it will be replaced with a space ' ' to keep the position of the digits in other input boxes. Also if a key down event was triggered with the input value already empty, it should focus on the previous element. Let's also ensure that there are values in the input boxes so that it can trigger the change event for deletion. This might be a little tough to write but here's the code for this test case:
...

describe('<OtpInput />', () => {
  ...

  it('should allow deleting of digits (focus on previous element)', () => {
    const value = faker.datatype.number({ min: 10, max: 999999 }).toString(); // minimum 2-digit so it can focus on the previous input
    const valueLength = value.length;
    const lastIdx = valueLength - 1;
    const onChange = jest.fn();

    renderComponent({
      value,
      valueLength,
      onChange,
    });

    const inputEls = screen.queryAllByRole('textbox');

    expect(inputEls).toHaveLength(valueLength);

    for (let idx = lastIdx; idx > -1; idx--) { // loop backwards to simulate the focus on the previous input
      const inputEl = inputEls[idx];
      const target = { value: '' };

      // trigger both change and keydown event
      fireEvent.change(inputEl, { target });
      fireEvent.keyDown(inputEl, {
        target,
        key: 'Backspace',
      });

      const valueArray = value.split('');

      valueArray[idx] = ' '; // the deleted digit is expected to be replaced with a space in the string

      const expectedValue = valueArray.join('');

      expect(onChange).toBeCalledTimes(1);
      expect(onChange).toBeCalledWith(expectedValue);

      // custom matcher to check that the focus is on the previous input
      // OR
      // focus is on the current input if previous input doesn't exist
      const inputFocused = inputEls[idx - 1] || inputEl;

      expect(inputFocused).toHaveFocus();

      onChange.mockReset();
    }
  });
});
Once the changes are saved, let's check the terminal and see what's displayed now:
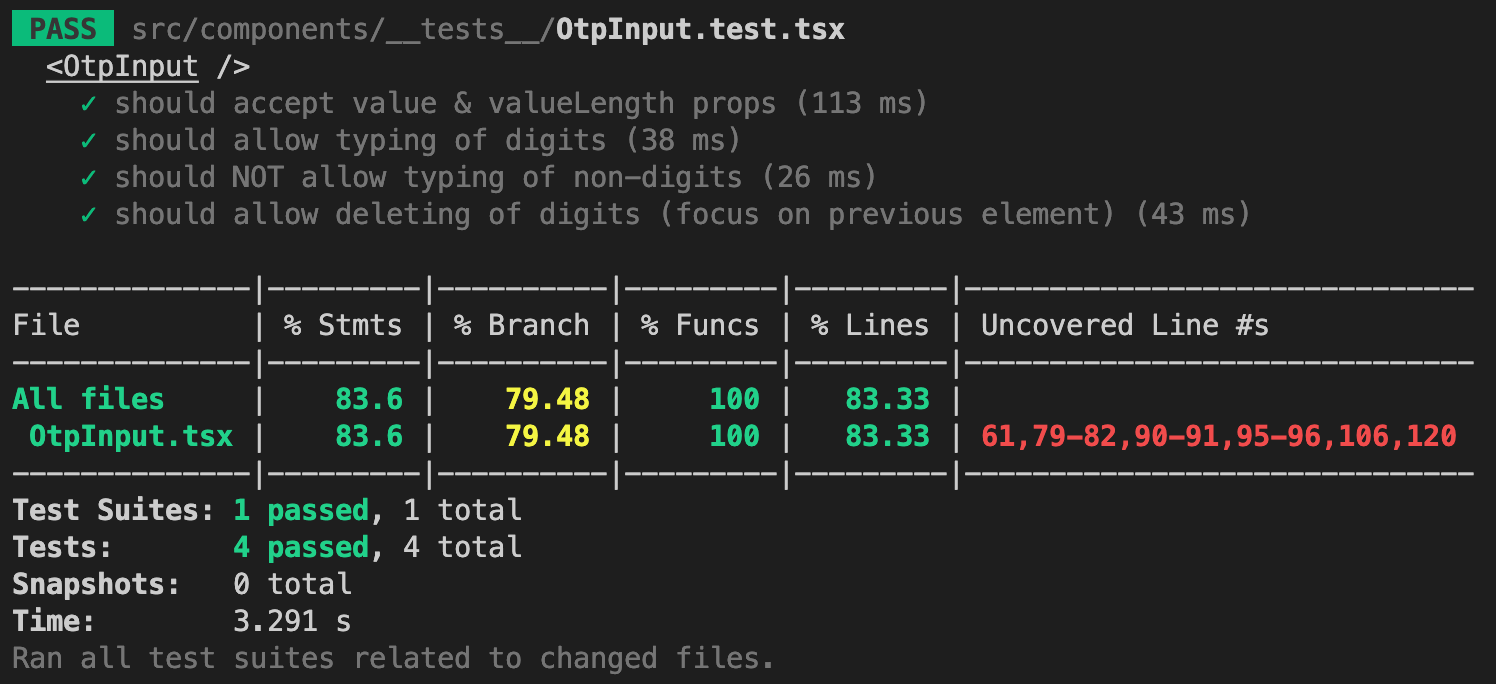
Awesome, it still PASS and the uncovered lines are getting lesser. Let's keep it going ~
Write tests to allow deleting of digits (do not focus on previous element)
So this test case is kind of a duplicate of the above with minor changes to cover line 106 of OtpInput.tsx. When the deletion happens but the input element wasn't previously empty, we should not focus on the previous element. Here's the test case for that:
...

describe('<OtpInput />', () => {
  ...

  it('should allow deleting of digits (do NOT focus on previous element)', () => {
    const value = faker.datatype.number({ min: 10, max: 999999 }).toString();
    const valueArray = value.split('');
    const valueLength = value.length;
    const lastIdx = valueLength - 1;
    const onChange = jest.fn();

    renderComponent({
      value,
      valueLength,
      onChange,
    });

    const inputEls = screen.queryAllByRole('textbox');

    expect(inputEls).toHaveLength(valueLength);

    for (let idx = lastIdx; idx > 0; idx--) { // idx > 0, because there's no previous input in index 0
      const inputEl = inputEls[idx];

      fireEvent.keyDown(inputEl, {
        key: 'Backspace',
        target: { value: valueArray[idx] },
      });

      const prevInputEl = inputEls[idx - 1];

      expect(prevInputEl).not.toHaveFocus();

      onChange.mockReset();
    }
  });
});
Since our previous test case already checks the onChange logic during deletion, here we just have to check that the previous element was not in focus when we trigger a keydown event with a key of Backspace and the target during the event had a value.
Alright, once you save the changes, and check the terminal, line 106 is removed from the uncovered lines. Sweet!
Write tests to not allow deleting of digits in the middle
This is a test case for a fix we did on Oct. 17, 2022 related to the deleting of digits in the middle after implementing the fix for the focus issue. This test case should be pretty straightforward using what we've learned so far. Let's generate a random 6-digit value, then use that to fill in the OTP input component. Focus on any of the input elements in the middle, let's choose with the third input element. Then, trigger a change event on that element where the event target value is empty which means the digit is deleted. We can verify that it didn't allow deletion of digits by checking if the onChange function was not called.
Here's the code for that test case:
...

describe('<OtpInput />', () => {
  ...

  it('should NOT allow deleting of digits in the middle', () => {
    const value = faker.datatype
      .number({ min: 100000, max: 999999 })
      .toString();
    const valueLength = value.length;
    const onChange = jest.fn();

    renderComponent({
      value,
      valueLength,
      onChange,
    });

    const inputEls = screen.queryAllByRole('textbox');
    const thirdInputEl = inputEls[2];
    const target = { value: '' };

    fireEvent.change(thirdInputEl, { target: { value: '' } });
    fireEvent.keyDown(thirdInputEl, {
      target,
      key: 'Backspace',
    });

    expect(onChange).not.toBeCalled();
  });
});
Once you save the changes, this should pass and cover line 61!
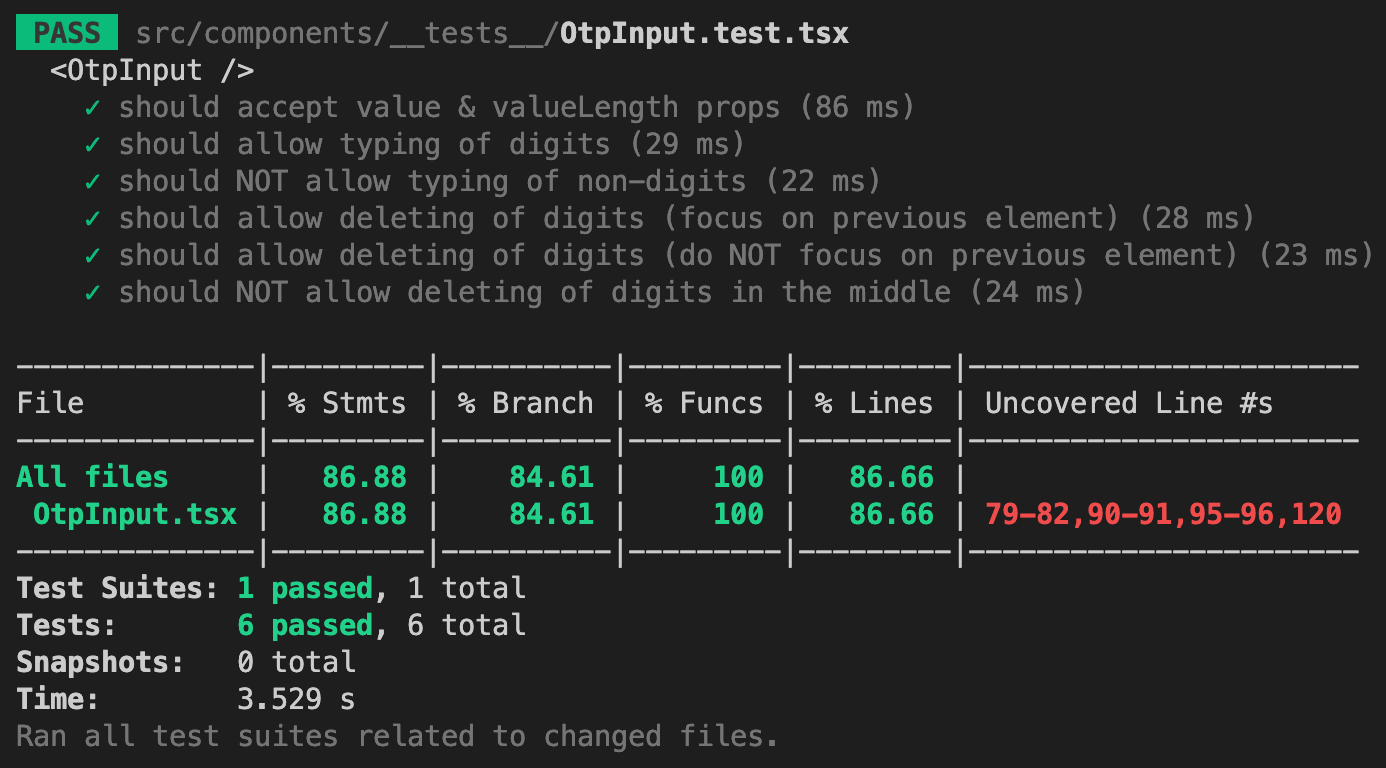
Write tests to allow pasting of digits
Okay, this test case should be easy enough for you to try out. I hope after learning how to write a couple of test cases above, you now have the knowledge and confidence to do this on your own. So first, before you start writing the code. Let's understand what's the logic for handling the paste event. So the paste event handling exists in the change event, it checks whether the target.value is a digit and also has the same length as the valueLength, we need to provide a digit that's more than one in length so that it is considered a paste event and not just a normal typing of a single digit. Do keep the value passed in the props as empty since we are pasting the value in the change event. Since we allow pasting in any of the elements, you can either loop through all the input elements and trigger the change event, or you can even just choose a random input element to paste on which I think is good enough. Now after you triggered the change event with the target.value containing the copied digits. You should check that the onChange mock function was called with the same digits in the change event. As we are doing a .blur() in the paste event, it is good to check that the input element does not have the focus.
Alright, I gave you the hints, try it out yourself!
Once you're done, compare it with the changes I did here:
...

describe('<OtpInput />', () => {
  ...

  it('should allow pasting of digits (same length as valueLength)', () => {
    const value = faker.datatype.number({ min: 10, max: 999999 }).toString(); // minimum 2-digit so it is considered as a paste event
    const valueLength = value.length;
    const onChange = jest.fn();

    renderComponent({
      valueLength,
      onChange,
      value: '', // keep the value prop empty to trigger the change event for paste
    });

    const inputEls = screen.queryAllByRole('textbox');

    // get a random input element from the input elements to paste the digits on
    const randomIdx = faker.datatype.number({ min: 0, max: valueLength - 1 });
    const randomInputEl = inputEls[randomIdx];

    fireEvent.change(randomInputEl, { target: { value } });

    expect(onChange).toBeCalledTimes(1);
    expect(onChange).toBeCalledWith(value);

    expect(randomInputEl).not.toHaveFocus();
  });
});
Okay if my changes are relatively the same as yours, then give yourself pat in the back!
The test coverage should look like this now:
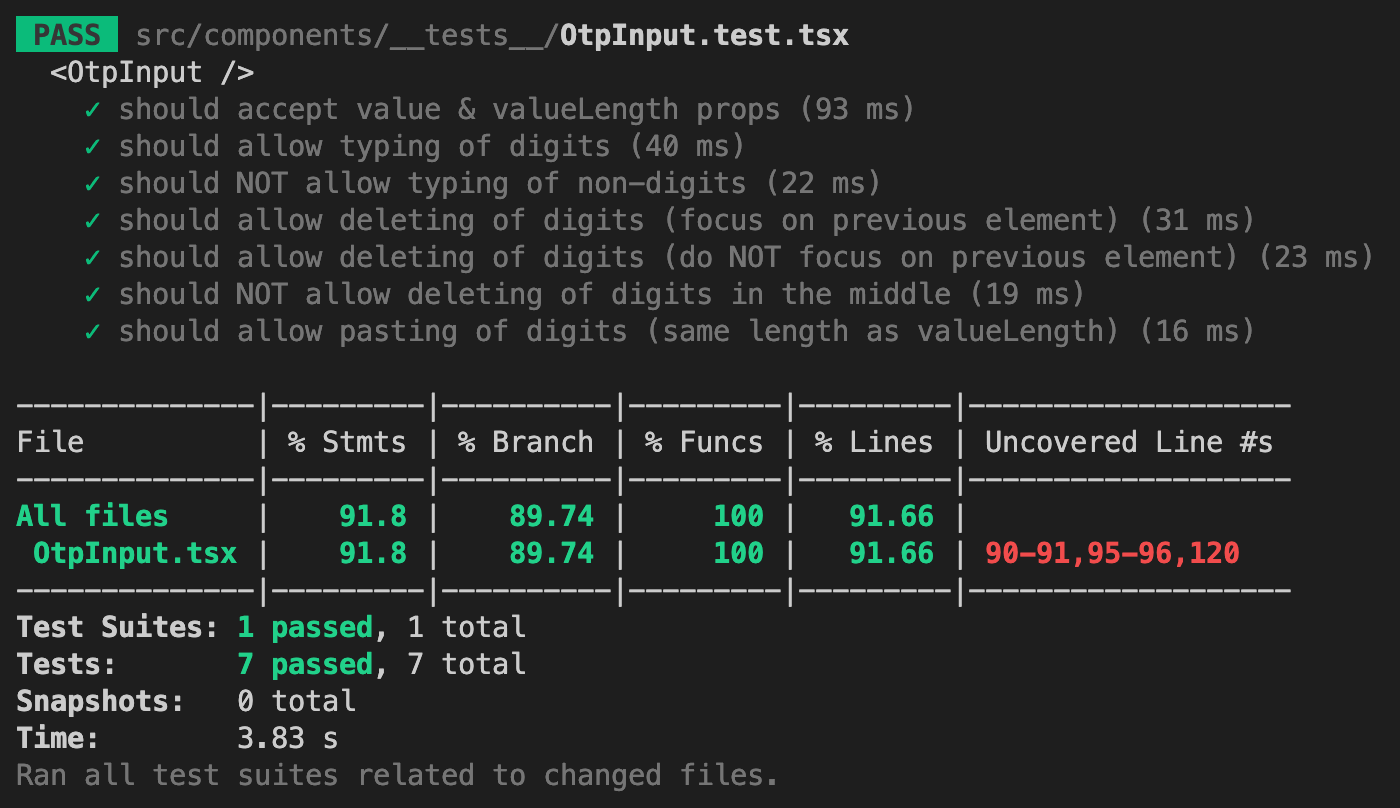
Since we're doing an if and else if conditions in the inputOnChange function in the OtpInput.tsx, line 79 will eventually be considered as uncovered lines because the else condition is not handled in our test cases yet. It may not show up now until you add the rest of the other test cases. So before that happens, let's just cover that now with the following code:
import { fireEvent, render, screen } from '@testing-library/react';
import { faker } from '@faker-js/faker';
import OtpInput, { Props } from '../OtpInput';

describe('<OtpInput />', () => {
  ...

  it('should NOT allow pasting of digits (less than valueLength)', () => {
    const value = faker.datatype.number({ min: 10, max: 99999 }).toString(); // random 2-5 digit code (less than "valueLength")
    const valueLength = faker.datatype.number({ min: 6, max: 10 }); // random number from 6-10
    const onChange = jest.fn();

    renderComponent({
      valueLength,
      onChange,
      value: '',
    });

    const inputEls = screen.queryAllByRole('textbox');
    const randomIdx = faker.datatype.number({ min: 0, max: valueLength - 1 });
    const randomInputEl = inputEls[randomIdx];

    fireEvent.change(randomInputEl, { target: { value } });

    expect(onChange).not.toBeCalled();
  });
});
Once you save the changes, this test case should pass as well.
Write tests for handling arrow keys
And for our next test case, we should cover the keydown events with arrow keys. This was implemented to improve the accessibility of our input boxes. Just a recap, if we press the right or down arrow keys on the keyboard, the focus should be on the next input element. And if we press the left or up arrow keys on the keyboard, the focus should be on the previous input element. These are all handled by the keydown event handler.
Let's first cover the right and down arrow keys. Here's the test case for that:
...

describe('<OtpInput />', () => {
  ...

  it('should focus to next element on right/down key', () => {
    renderComponent({
      value: '',
      valueLength: 3,
      onChange: jest.fn(),
    });

    const inputEls = screen.queryAllByRole('textbox');
    const firstInputEl = inputEls[0];

    fireEvent.keyDown(firstInputEl, { key: 'ArrowRight' });

    const secondInputEl = inputEls[1];

    expect(secondInputEl).toHaveFocus();

    fireEvent.keyDown(secondInputEl, { key: 'ArrowDown' });

    const thirdInputEl = inputEls[2];

    expect(thirdInputEl).toHaveFocus();
  });
});
Here I did it manually so that it is easier to understand. First I triggered a keydown event with a key of ArrowRight to the first input element then checked that the second input element has the focus. Then I triggered another keydown event with a key of ArrowDown to the second input element then checked that the third input element has the focus.
Now by just merely changing the variables and the keys, you can cover the left and up arrow keys. Try it yourself!
Once you're done, check that the changes you did are about the same as mine:
...

describe('<OtpInput />', () => {
  ...

  it('should focus to next element on left/up key', () => {
    renderComponent({
      value: '',
      valueLength: 3,
      onChange: jest.fn(),
    });

    const inputEls = screen.queryAllByRole('textbox');
    const thirdInputEl = inputEls[2];

    fireEvent.keyDown(thirdInputEl, { key: 'ArrowLeft' });

    const secondInputEl = inputEls[1];

    expect(secondInputEl).toHaveFocus();

    fireEvent.keyDown(secondInputEl, { key: 'ArrowUp' });

    const firstInputEl = inputEls[0];

    expect(firstInputEl).toHaveFocus();
  });
});
Don't forget to save your changes before you check the terminal:
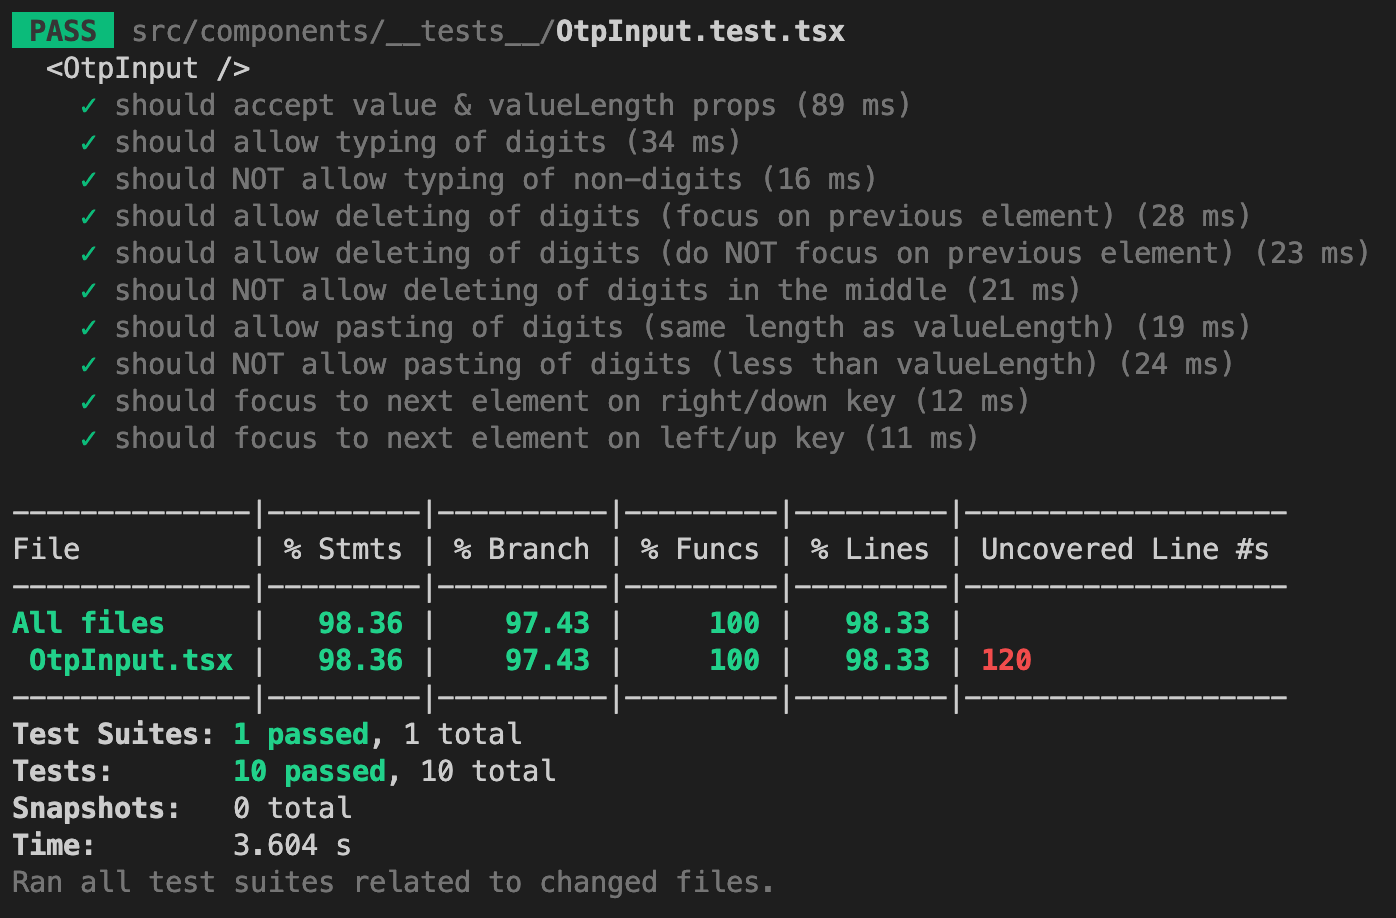
Write tests to only focus to input if previous input has value
This is the test case for a fix we did on Oct. 17, 2022 related to the focus issue. For this test case, it can be just a straightforward one by having an empty OTP input with a length of 6. Focus on the last input element and verify that the focus is in the first input element instead.
Here's the test case for that:
...

describe('<OtpInput />', () => {
  ...

  it('should only focus to input if previous input has value', () => {
    const valueLength = 6;

    renderComponent({
      valueLength,
      value: '',
      onChange: jest.fn(),
    });

    const inputEls = screen.queryAllByRole('textbox');
    const lastInputEl = inputEls[valueLength - 1];

    lastInputEl.focus();

    const firstInputEl = inputEls[0];

    expect(firstInputEl).toHaveFocus();
  });
});
Once you saved the changes, here's what you should see in your terminal:
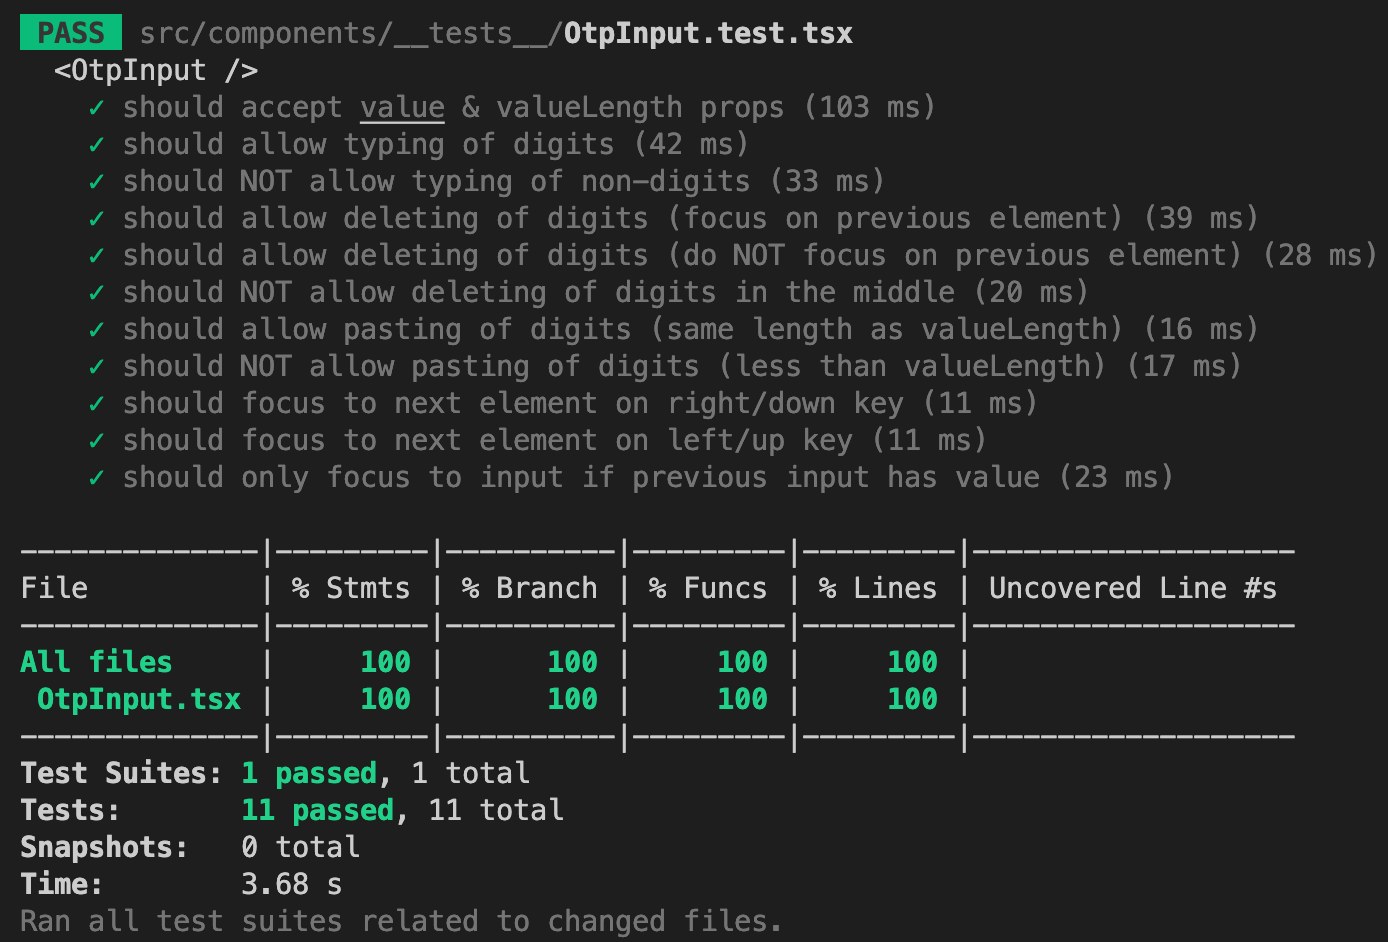
Wow, all green which means we have 100% test coverage. That's very satisfying to see, ain't it?
We have completed writing tests for our React OTP Input component. Well done for reaching to this point ~
That's it! You've just built your own OTP input in React and TypeScript and also learned how to write tests for it using Jest and Testing Library. I hope you've learned a lot from this post, especially if you're new to TypeScript and Jest. The OTP input we have just built is reusable and provides great user experience while keeping in mind the best practices when implementing an OTP input. You can customize the valueLength prop to meet your requirements, be it a 4-PIN code, 5-digit pass code or 6-digit one-time code. As I mentioned earlier, there's tons of OTP input boxes I've seen out there but some of them don't give a great user experience like this, so please share to your network, colleagues or anyone you think might find this post helpful and let's make OTP input boxes great again!
In case you need the final code of the OTP input component as a reference, here's the GitHub repository.
I'll be writing more posts about "building your own components in React and TypeScript with tests". So stay tuned and come back again to my blog to check out what's new.
Cheers ~