Introduction
This is a guide on how to set up a local development for NestJS (a progressive Node.js framework) projects with TypeScript, PostgreSQL and pgAdmin4 using Docker Compose. We'll be using TypeORM to connect and talk to our PostgreSQL database. This is your quick way to get started with Nest and it also involves extensions and libraries that helps us save time and energy when writing our code.
Skip
If you don't want to go through the steps below and you just want to get the boilerplate to save time, you can clone it here or run the git command below:
git clone git@github.com:dominicarrojado/nestjs-postgres-boilerplate.git my-app
Don't forget to ⭐ and share the repo if you like it!
Prerequisites
Upon writing this post, I assume that you have some server-side application development background and basic knowledge regarding npm, yarn, JavaScript, TypeScript, Docker, Docker Compose, Node.js, NestJS, TypeORM and PostgreSQL.
Please make sure to install Yarn and Docker Desktop in your system if you haven't. We use Yarn as our package manager, it's just like npm but faster. While we use Docker throughout the development lifecycle for fast, easy and portable application development.
We'll be using Visual Studio Code as our IDE in setting this local development setup as we will utilize a few extensions from their marketplace.
You can also use Postman to interact with the API but that's optional as this won't be a full Nest tutorial.
Initialize your project
Setting up a new project is quite simple with the Nest CLI. With yarn installed, you can create a new Nest project with the following commands in your OS terminal:
yarn global add @nestjs/cli
nest new my-app
Choose yarn as the package manager.
Once installed, let's run our project to see if everything is working fine by executing the command below:
cd my-app
yarn start
Once the application is running, open your browser and go to http://localhost:3000/. You should see a Hello World! message.
To watch for changes in your files, you can run the following command instead to start the application:
yarn start:dev
This command will watch your files, when you have changes, it will automatically start recompiling and reloading the server. That's great for local development!
To build and run our Nest application for production, you can simply run the following command:
yarn build
yarn start:prod
Install extensions in Visual Studio Code
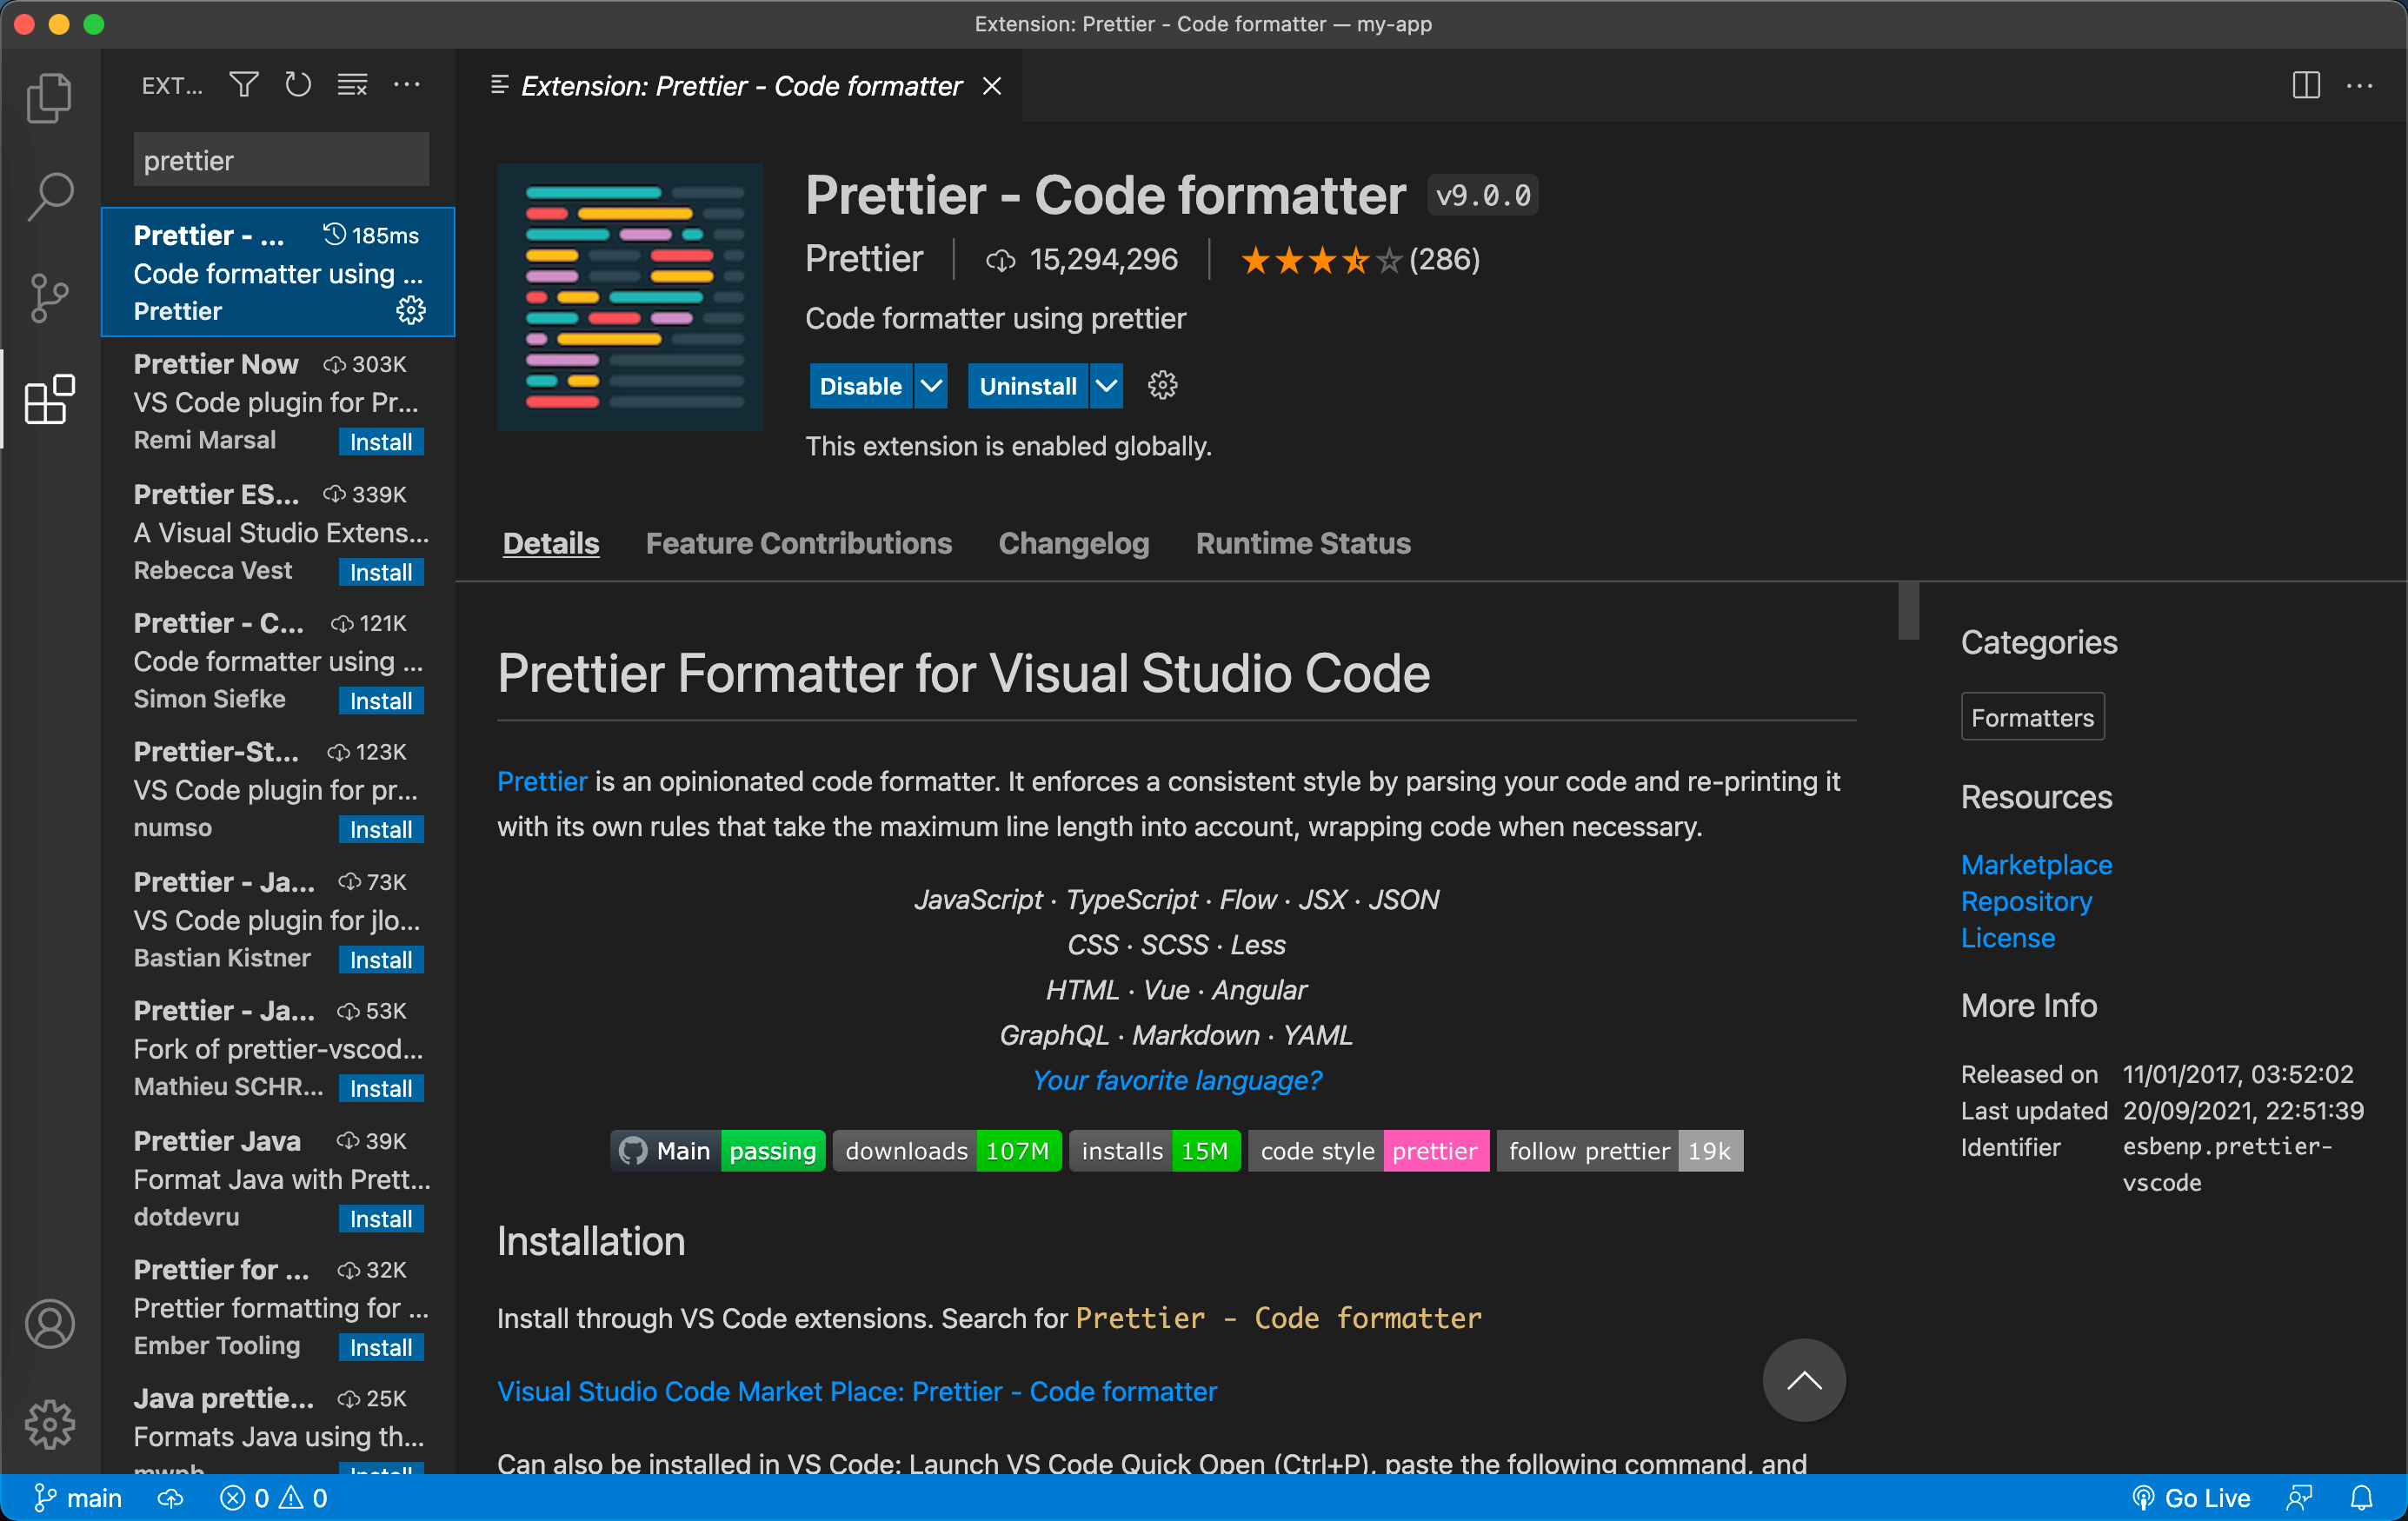
Open the created project in your Visual Studio Code. Let's install Prettier, it's a code formatter that formats the code for us when we save file changes which is a time-saver.
Click on the "Extensions" tab and look for "Prettier" and install it. You can also install it via this link.
After Prettier is installed, we still need to enable the formatting feature by updating our settings in Visual Studio Code. Let's create a folder in the root directory and name it .vscode. Then, create a file inside it and name it settings.json. Then update the created file with the code below:
{
  "editor.formatOnSave": true,
  "editor.defaultFormatter": "esbenp.prettier-vscode",
  "editor.tabSize": 2
}
Feel free to modify editor.tabSize as that can be changed according to your preference.
When we created a new Nest project, it already includes .prettierrc which is the config for Prettier to follow when formatting the code. These configs can be updated according to your preference.
Alright, once the changes are done. That should make our Prettier work.
You can also install ESLint extension in Visual Studio Code to help with the linting checks.
Dockerfile
A Dockerfile is a text document that contains the instructions for Docker to assemble or build an image.
Let's create a Dockerfile in the root folder of our application and add the following code below:
# syntax=docker/dockerfile:1

FROM node:16.14.2-alpine
ENV NODE_ENV=production

WORKDIR /app

COPY [ "package.json", "yarn.lock*", "./" ]

RUN yarn install --frozen-lockfile --production

COPY . .

RUN yarn global add @nestjs/cli
RUN yarn build

CMD [ "yarn", "start:prod" ]
If you're new to Docker or you need an explanation of what each line does, you can refer to the section here from Docker Documentation, they explained it really well while walking you through the process of creating a Dockerfile for Node.js. The Dockerfile we have created here is based on their example.
Next, let's create a .dockerignore file in the root folder with the following content:
node_modules
dist
Files or directories added in this file will get excluded in the build context. This will increase the build's performance and improve the context load time.
Build image
Now that we've created our Dockerfile, let's build our image. You are able to do this by the docker build command. The docker build command builds Docker images from a Dockerfile and a "context". A build's context is the set of files located in the specified PATH or URL. The Docker build process can access any of the files located in the context.
The build command optionally takes a --tag flag. The tag is used to set the name of the image and an optional tag in the format name:tag. We'll leave off the optional "tag" for now to help simplify things. If you do not pass a tag, Docker will use "latest" as its default tag. You'll see this in the last line of the build output.
Let's build our first Docker image. Do remember to start your Docker Desktop application before executing the command below:
docker build --tag nest-docker .
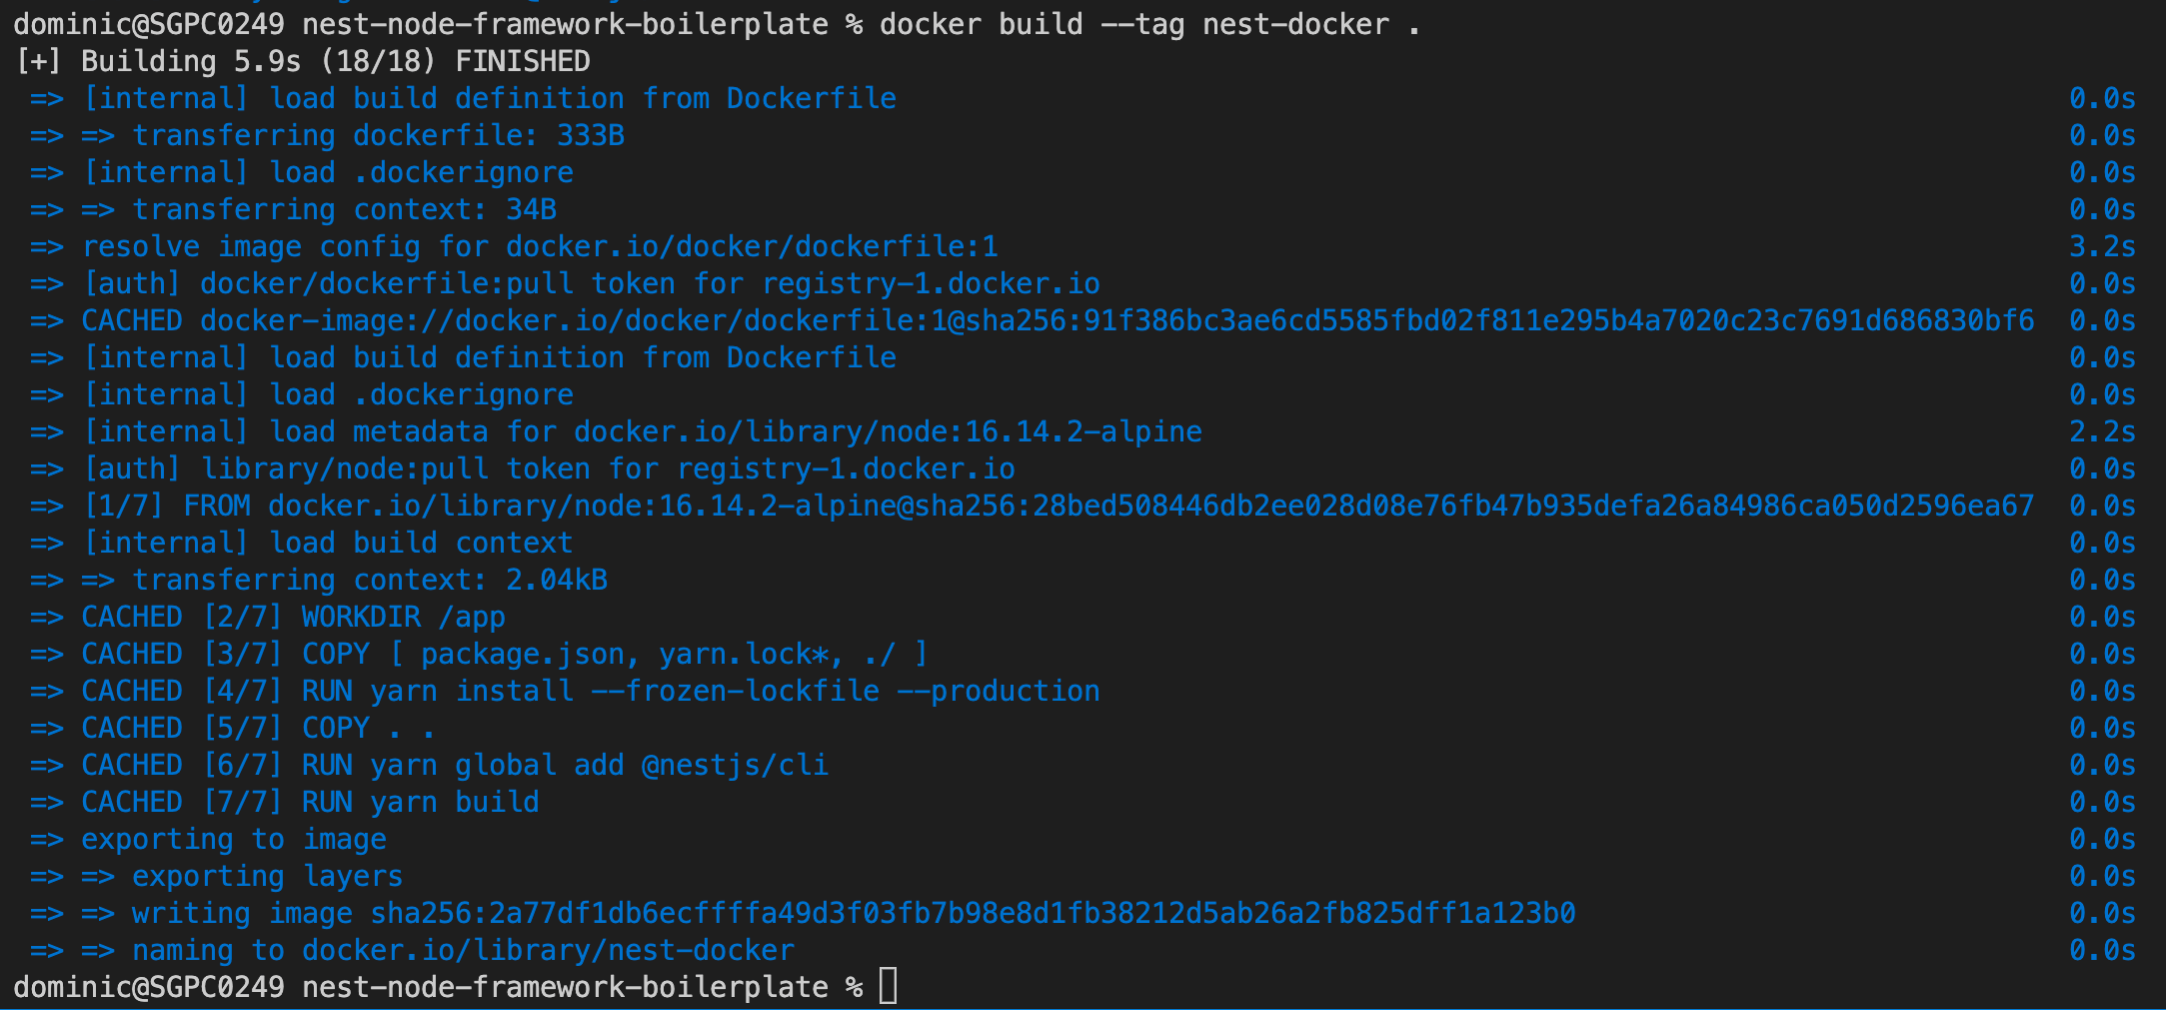
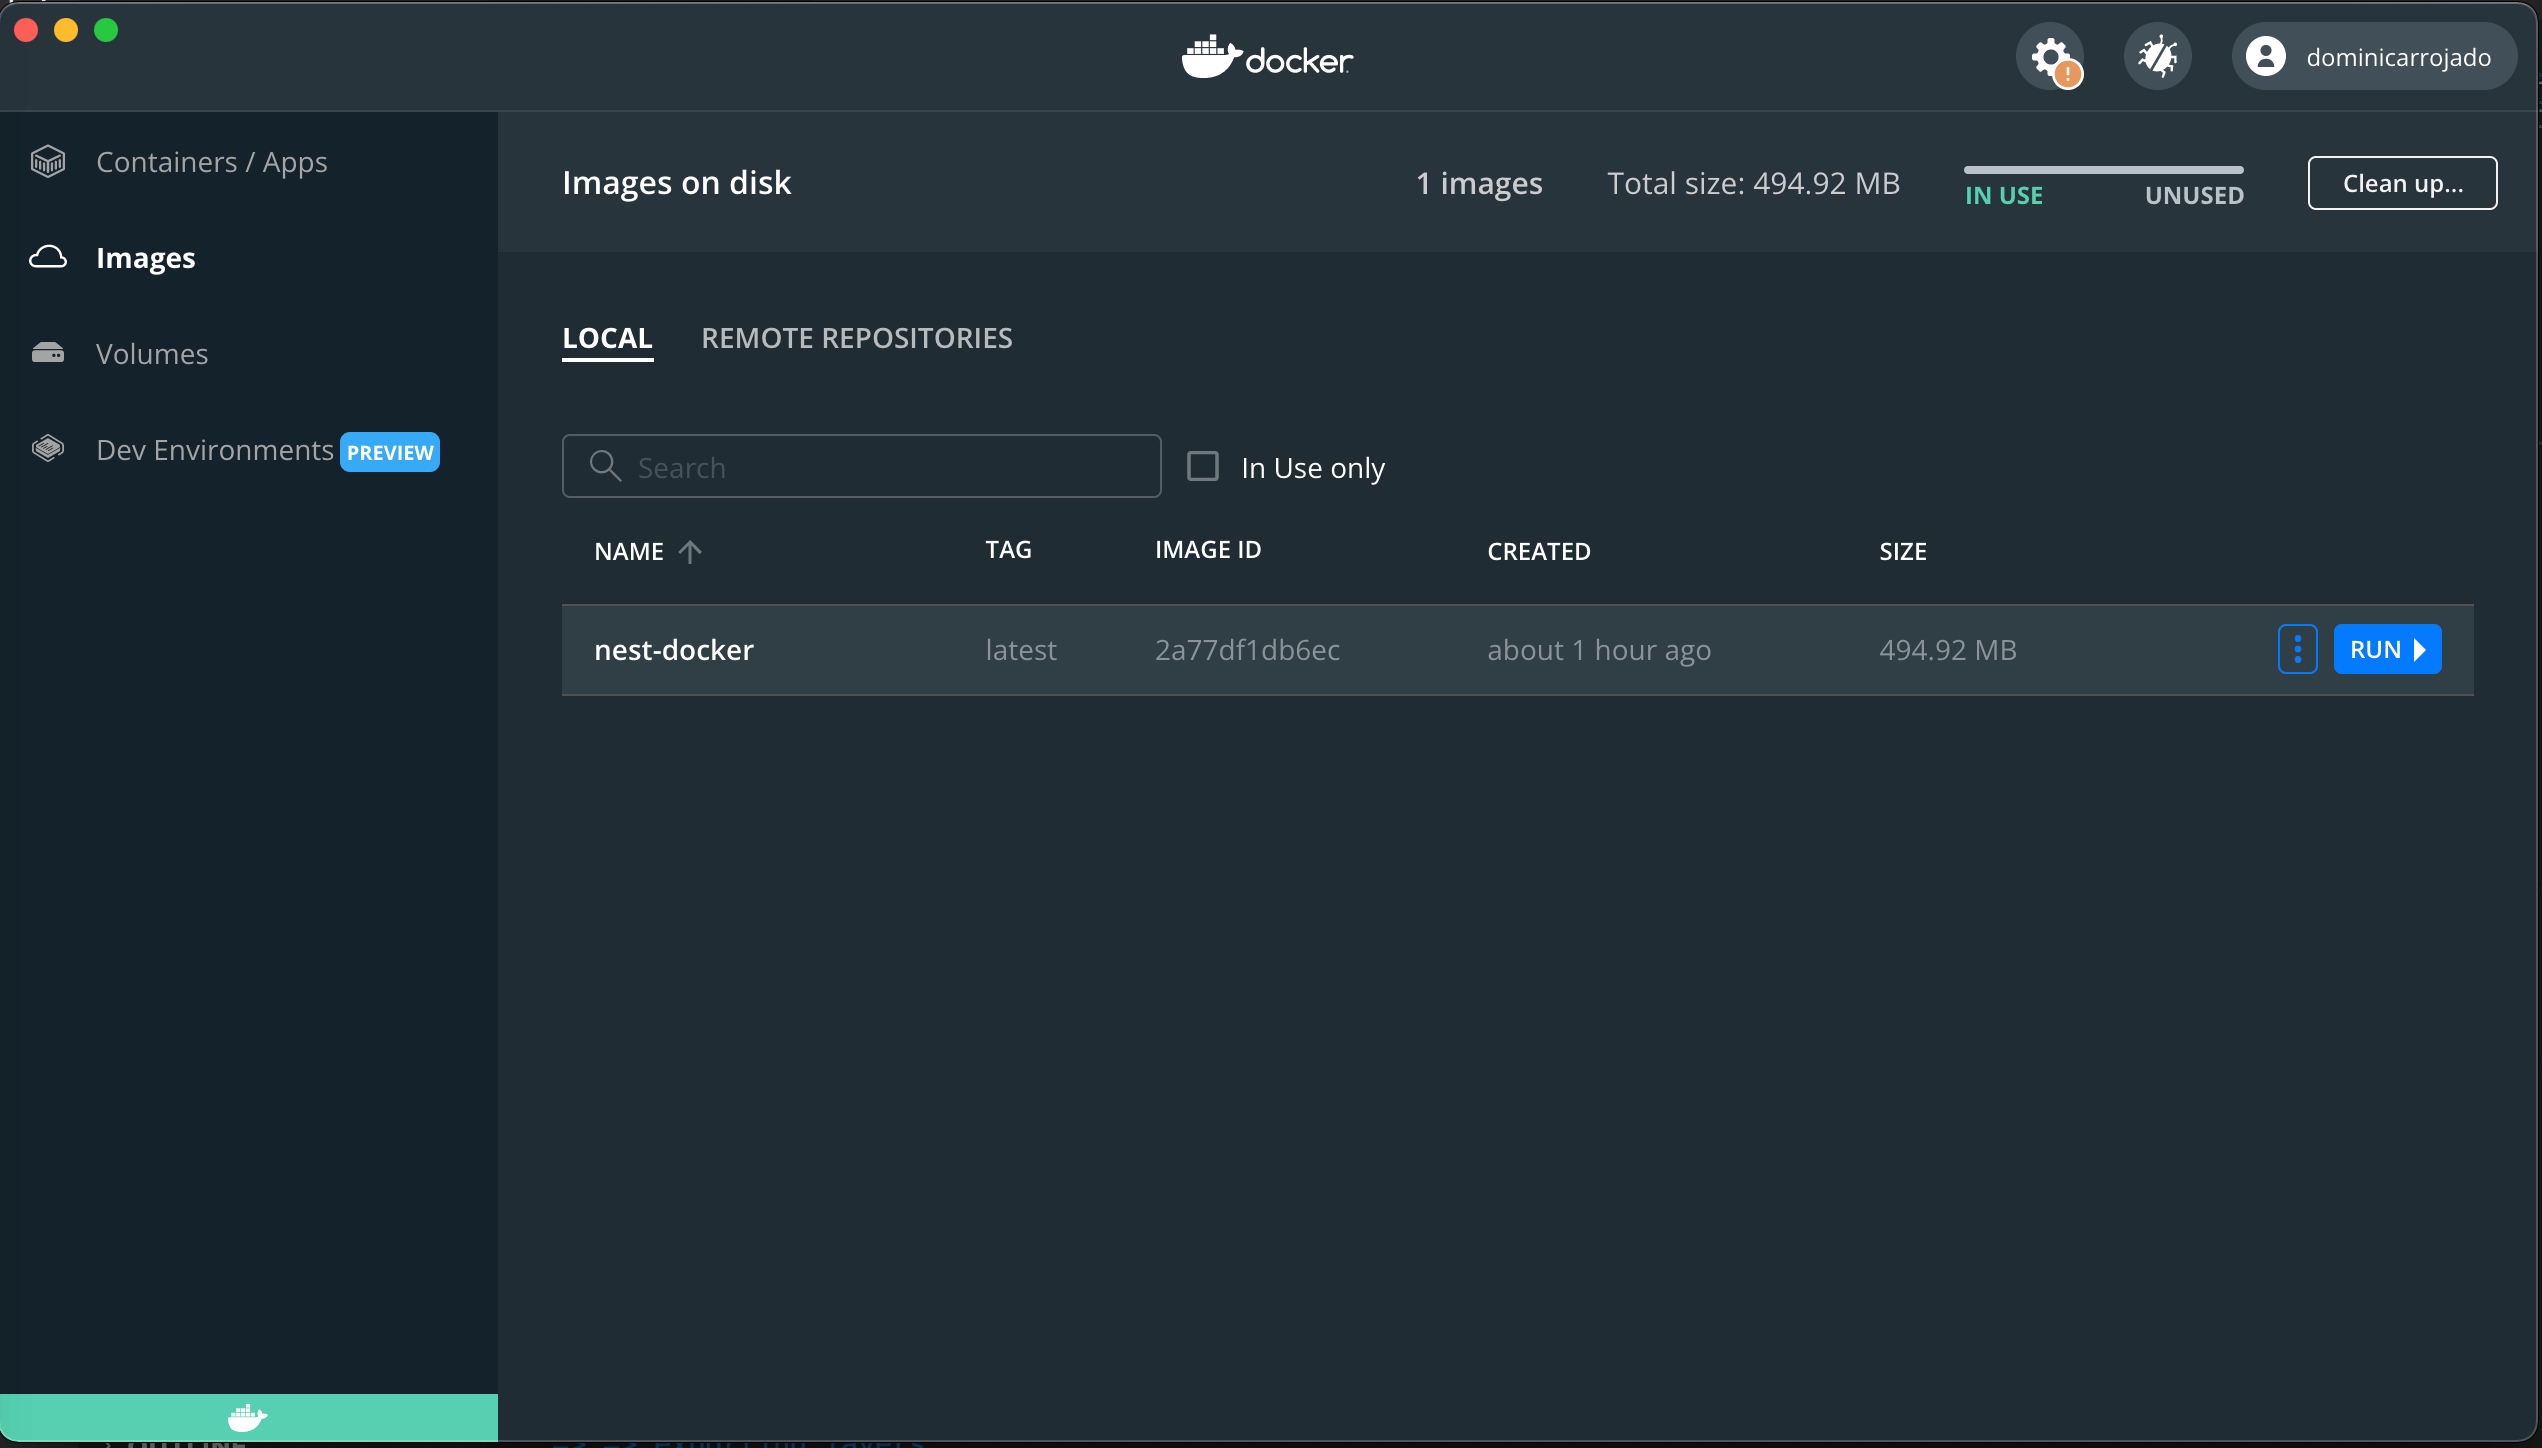
If you open your Docker Desktop, you'll see our nest-docker image in the "Images" tab.
Run our image as a container
Now that we have an image, we can run that image and see if our application is running correctly.
A container is a normal operating system process except that this process is isolated and has its own file system, its own networking, and its own isolated process tree separate from the host.
To run an image inside of a container, we use the docker run command. Let's start our image and make sure it is running correctly. Execute the following command in your terminal.
docker run --detach --publish 3000:3000 nest-docker
We have 2 parameters in this command, that's --detach and --publish 3000:3000. So remember that containers run in isolation, hence we are not able to connect to it unless we publish it. To publish a port for our container, we used the --publish flag (-p for short) on the docker run command. The format of the --publish command is [host port]:[container port]. We can then access our application running in the container port via the host port. While --detach basically runs our container in detached mode or in the background so that our terminal (which where we ran the command) will not have it connected.
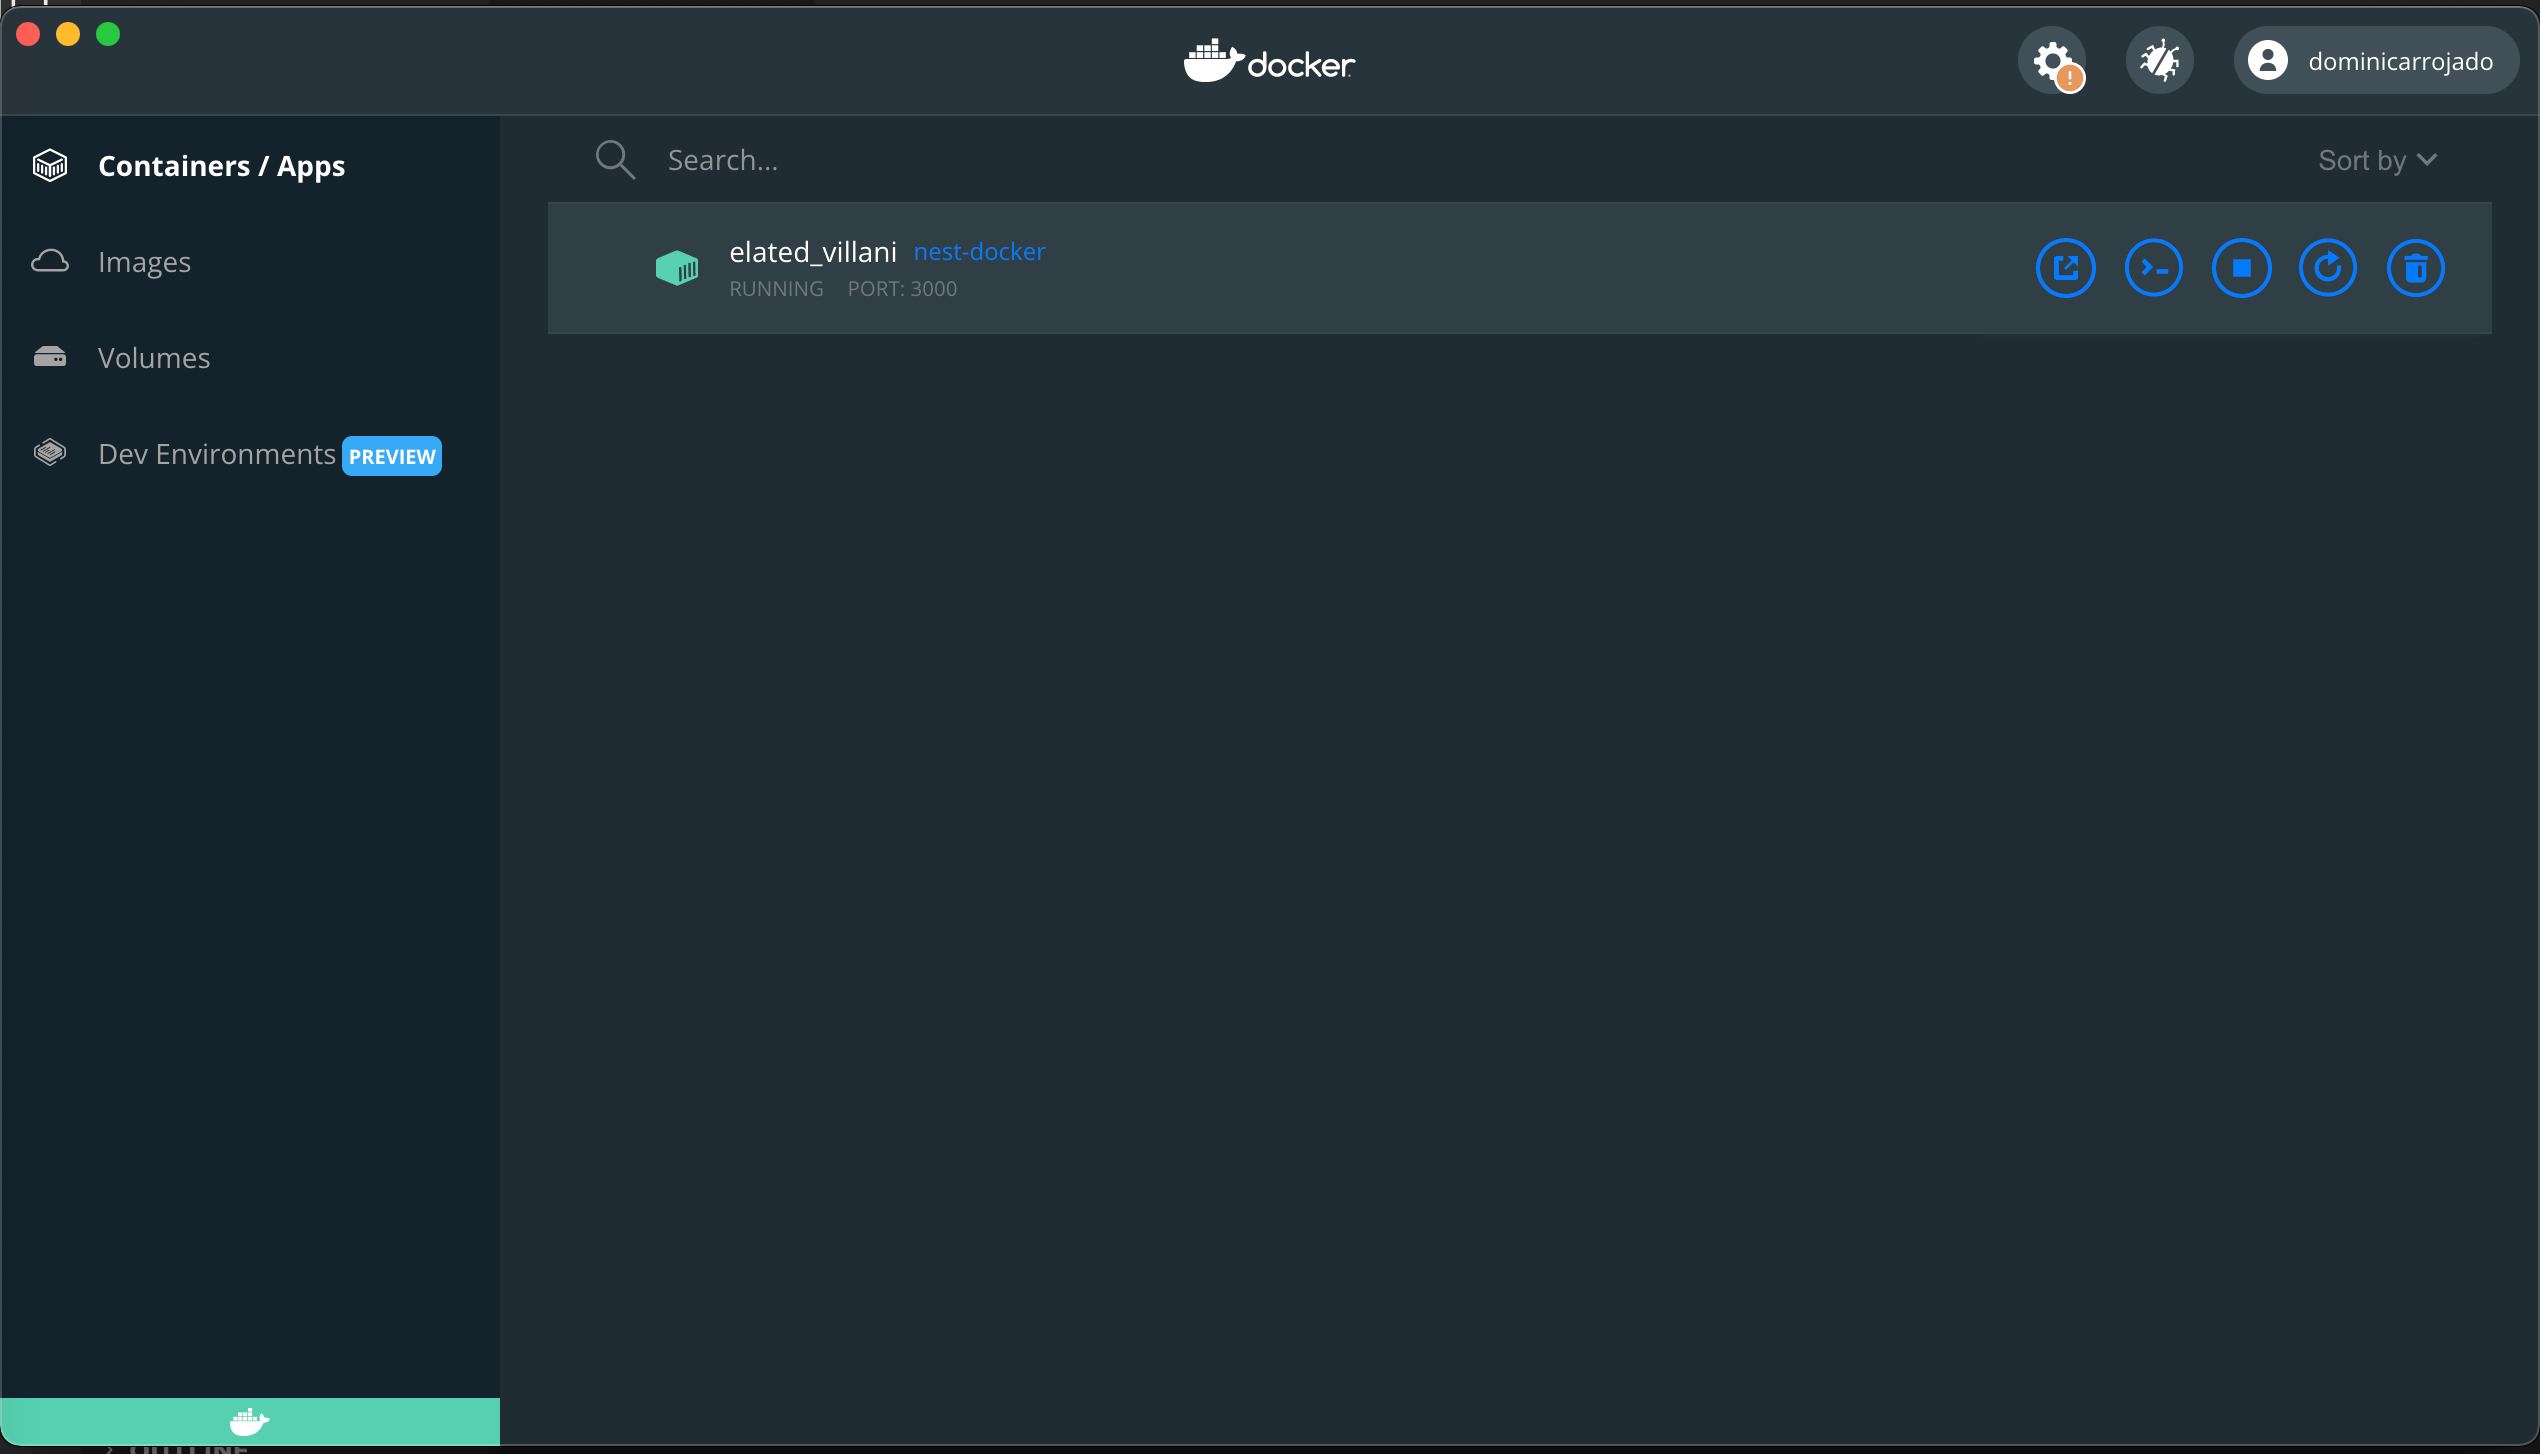
Now that the application is running, open your browser and go to http://localhost:3000/. You should see the same Hello World! message.
Now we have successfully containerized our application.
Multi-stage builds
Currently, we only containerized our application for production. But how about for (local) development? Multi-stage builds are the way to go. With multi-stage builds, we can use multiple FROM statements in our Dockerfile. Each FROM instruction can use a different base, and each of them begins a new stage of the build.
Let's update our Dockerfile with the following code:
# syntax=docker/dockerfile:1

FROM node:16.14.2-alpine AS base

WORKDIR /app

COPY [ "package.json", "yarn.lock*", "./" ]

FROM base AS dev
ENV NODE_ENV=development
RUN yarn install --frozen-lockfile
COPY . .
CMD [ "yarn", "start:dev" ]

FROM base AS prod
ENV NODE_ENV=production
RUN yarn install --frozen-lockfile --production
COPY . .
RUN yarn global add @nestjs/cli
RUN yarn build
CMD [ "yarn", "start:prod" ]
Now we can build the image with a target using the docker build command with a --target parameter. Let's use dev as our target to build and run our application for local development.
docker build --target dev --tag nest-docker .
docker run --detach --publish 3000:3000 nest-docker
This should run the application properly in dev mode.
Docker Compose
Just using Dockerfile for our local development is not productive enough yet. When we make changes to our application, we will need to stop it, rebuild it and run it again. Also later on, we will need to configure the database to connect and use in our application. This whole process can be optimized using Docker Compose. Docker Compose is a tool for defining and running multi-container Docker applications. With Docker Compose, you use a YAML file to configure your application's services. Then, with a single command, you create and start all the services from your configuration. That sounds great, right?
Let's go ahead and create a docker-compose.yml file in the root folder and add the following code:
version: '3.9'
services:
  app:
    build:
      context: .
      dockerfile: Dockerfile
      target: dev
    ports:
      - 3000:3000
    volumes:
      - ./src:/app/src
Most of the keys here should be familiar to you except the volumes key. The volumes key mounts the project directory (current directory, ./src) on the host to /app/src directory inside the container, allowing you to modify the code on the fly, without having to rebuild the image.
Once the changes are saved, let's test it out by running the following command:
docker-compose build
docker-compose up

# OR

docker-compose up --build
Do remember to stop the docker image we ran previously via the Docker Desktop as we cannot run two applications on the same port.
Now try making a change within the application code, go to src/app.service.ts and a few more ! to the Hello World message. Once you save the changes, it will automatically send the new code to the container and that will trigger the rebuild of the application as it is running via yarn start:dev or nest start --watch. Awesome!
Let's add this docker-compose command in our package.json scripts so that we can easily type and remember the command in a shorter form:
{
  "name": "my-app",
  ...
  "scripts": {
    ...
    "docker-compose:dev": "docker-compose up --build"
  },
  ...
}
PostgreSQL and pgAdmin4
In this post, we'll use PostgreSQL as our database and pgAdmin4 for our database admin tool to complete our local development setup.
Let's update our docker-compose.yml to include their respective docker images:
...
  app:
    ...
    depends_on:
      - db

  db:
    image: postgres
    restart: always
    ports:
      - 5432:5432
    environment:
      POSTGRES_PASSWORD: postgres

  dbadmin:
    image: dpage/pgadmin4
    restart: always
    ports:
      - 5050:80
    environment:
      PGADMIN_DEFAULT_EMAIL: admin@admin.com
      PGADMIN_DEFAULT_PASSWORD: pgadmin4
PostgreSQL image runs on port 5432 by default and we are just exposing the same port for our application to connect to. The only environment variable required is POSTGRES_PASSWORD, the rest are optional or will use the default values. Hence, we have defined a password here. You can read more about the other environment variables for PostgreSQL here. The default value for POSTGRES_USERNAME and POSTGRES_DATABASE would be postgres.
On the other hand, pgAdmin4 image runs on port 80 by default and we are making it accessible outside the container on port 5050. There are two environment variables required: PGADMIN_DEFAULT_EMAIL and PGADMIN_DEFAULT_PASSWORD. You can read more about the other environment variables for pgAdmin4 here.
We can control the order of service startup and shutdown with the depends_on option. Hence we have added db as a dependency for our app service.
Let's build and run our Docker Compose and everything should be working fine:
yarn docker-compose:dev
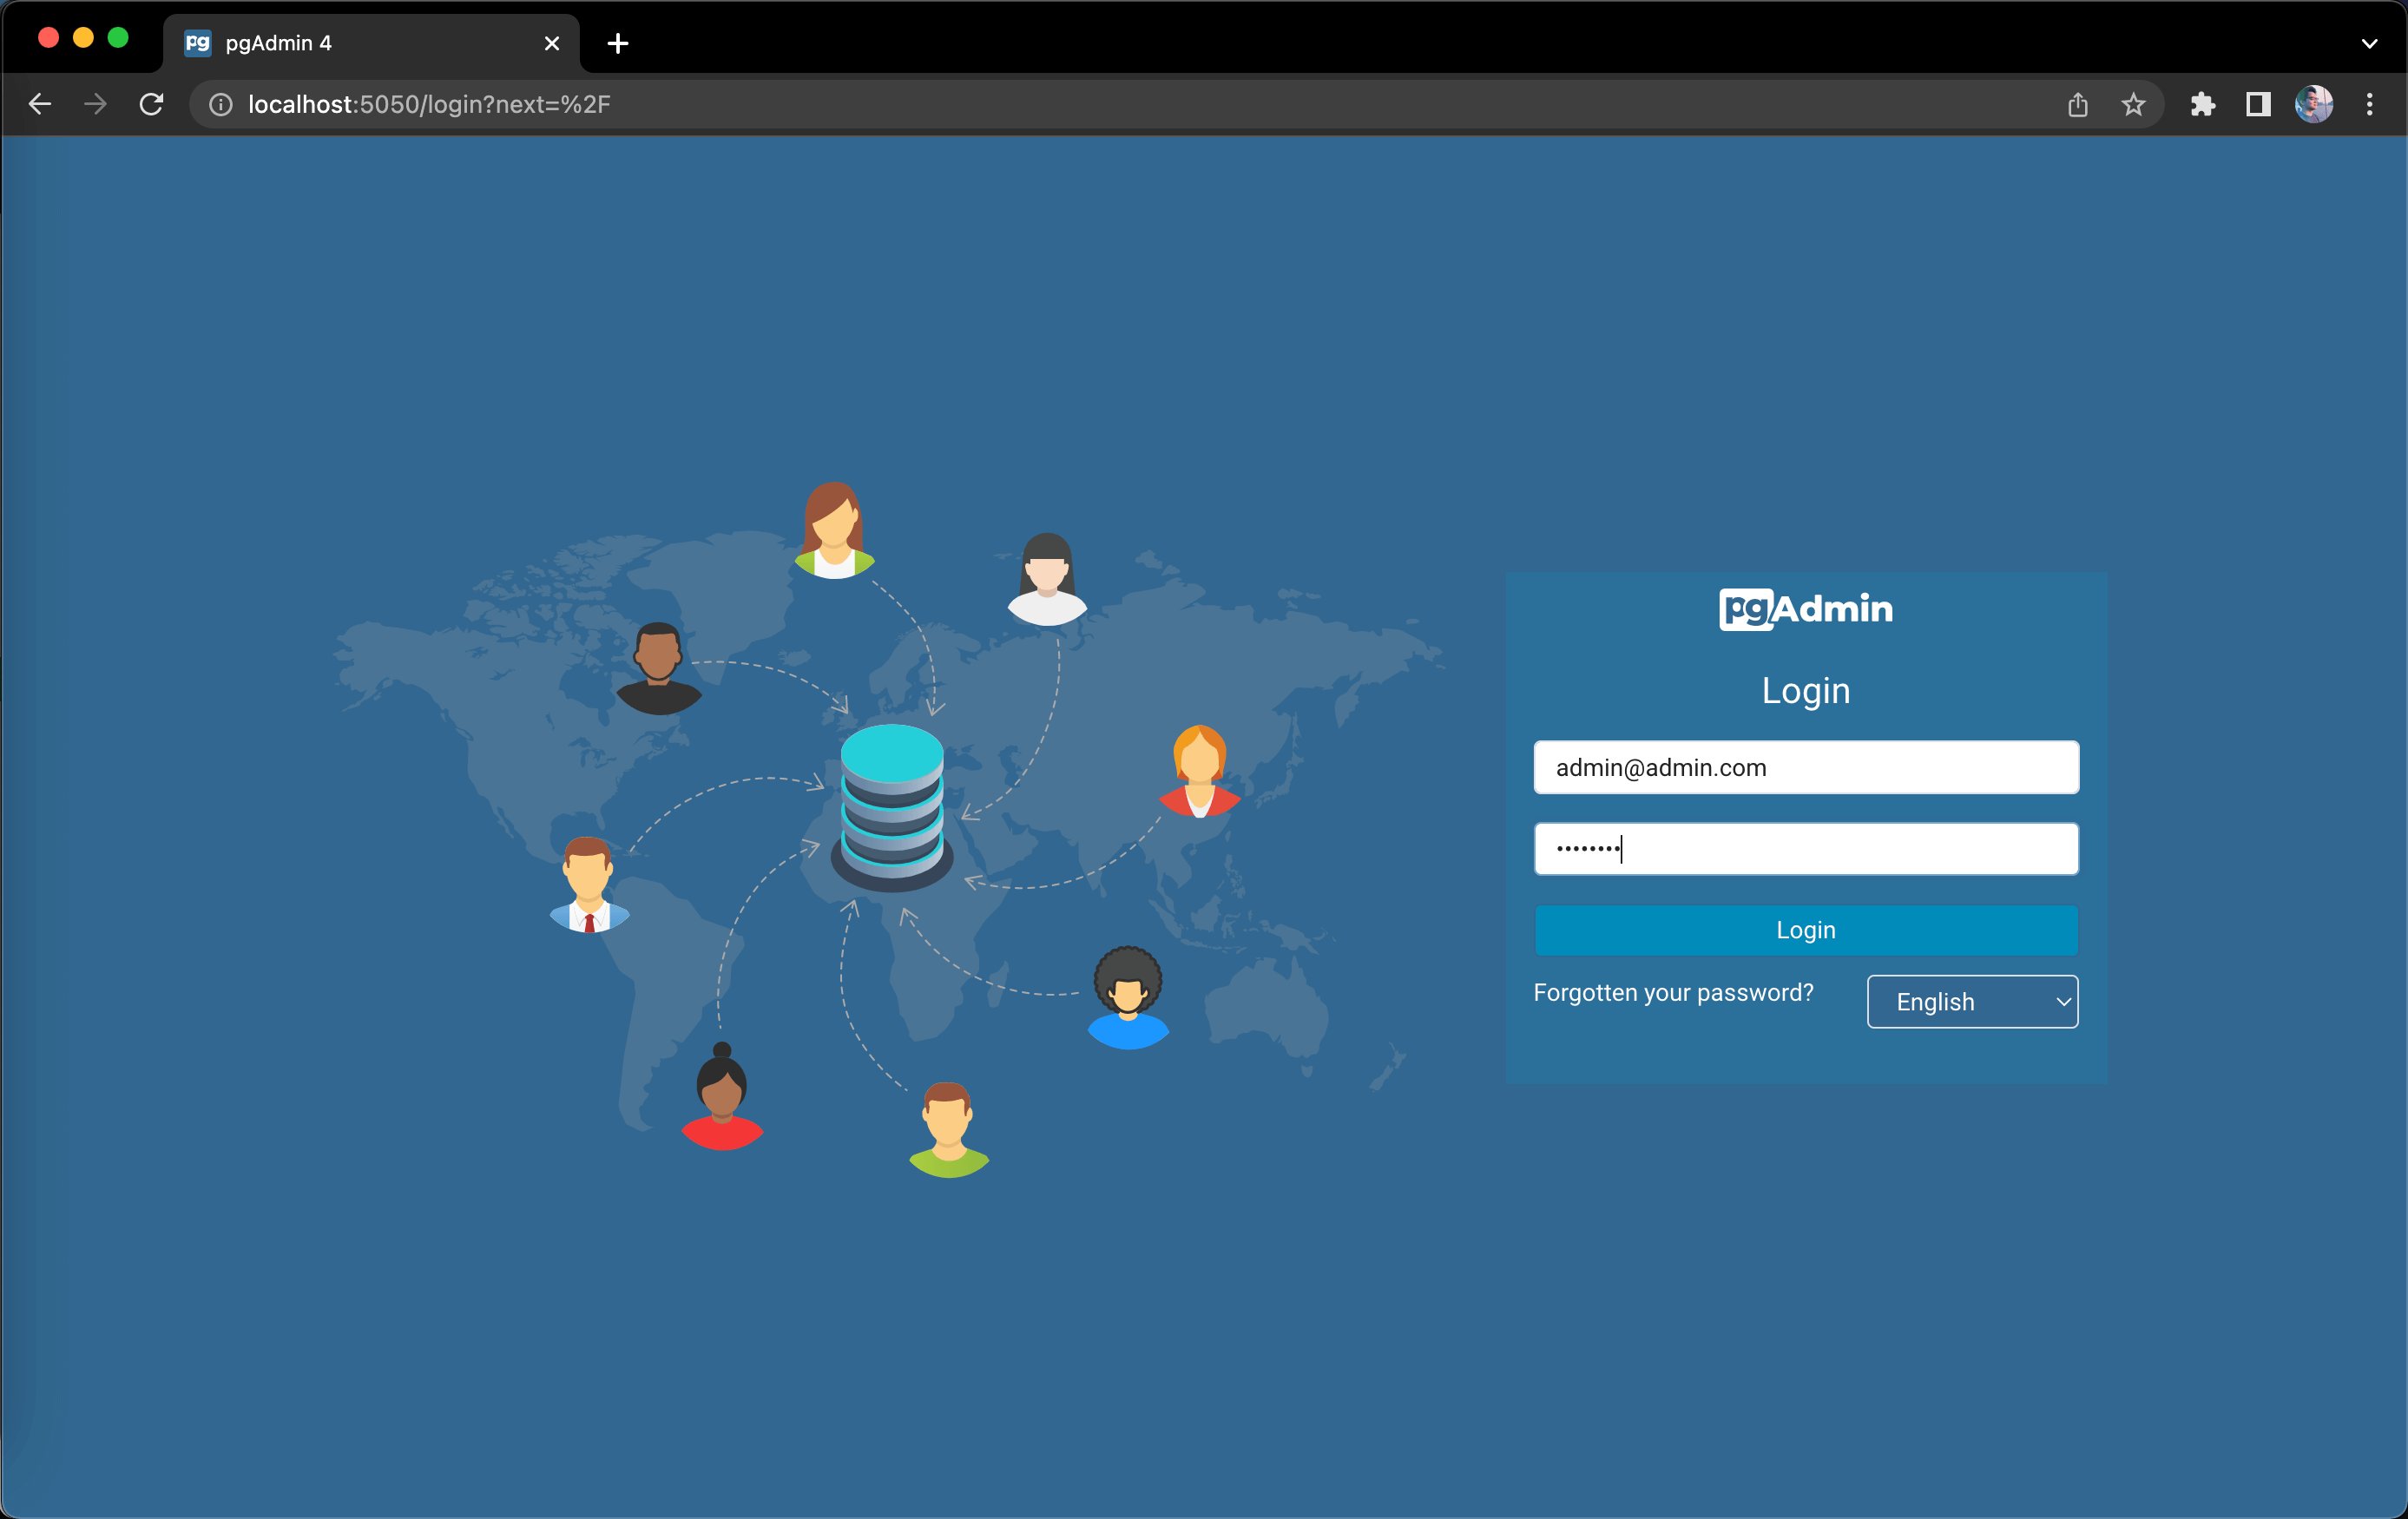
Once all the environments are up and running, open your browser and go to http://localhost:5050/. You will be redirected to log in to pgAdmin4. Type in the default email and password we have provided in the docker-compose.yml.
After successfully logging in, do a right-click on the "Servers" located at the left-hand side of the portal then click "Register - Server". It will open up a modal, under the "General" tab, give the server a name (e.g. "Nest Docker"). Then, go to the "Connection" tab and input the following:
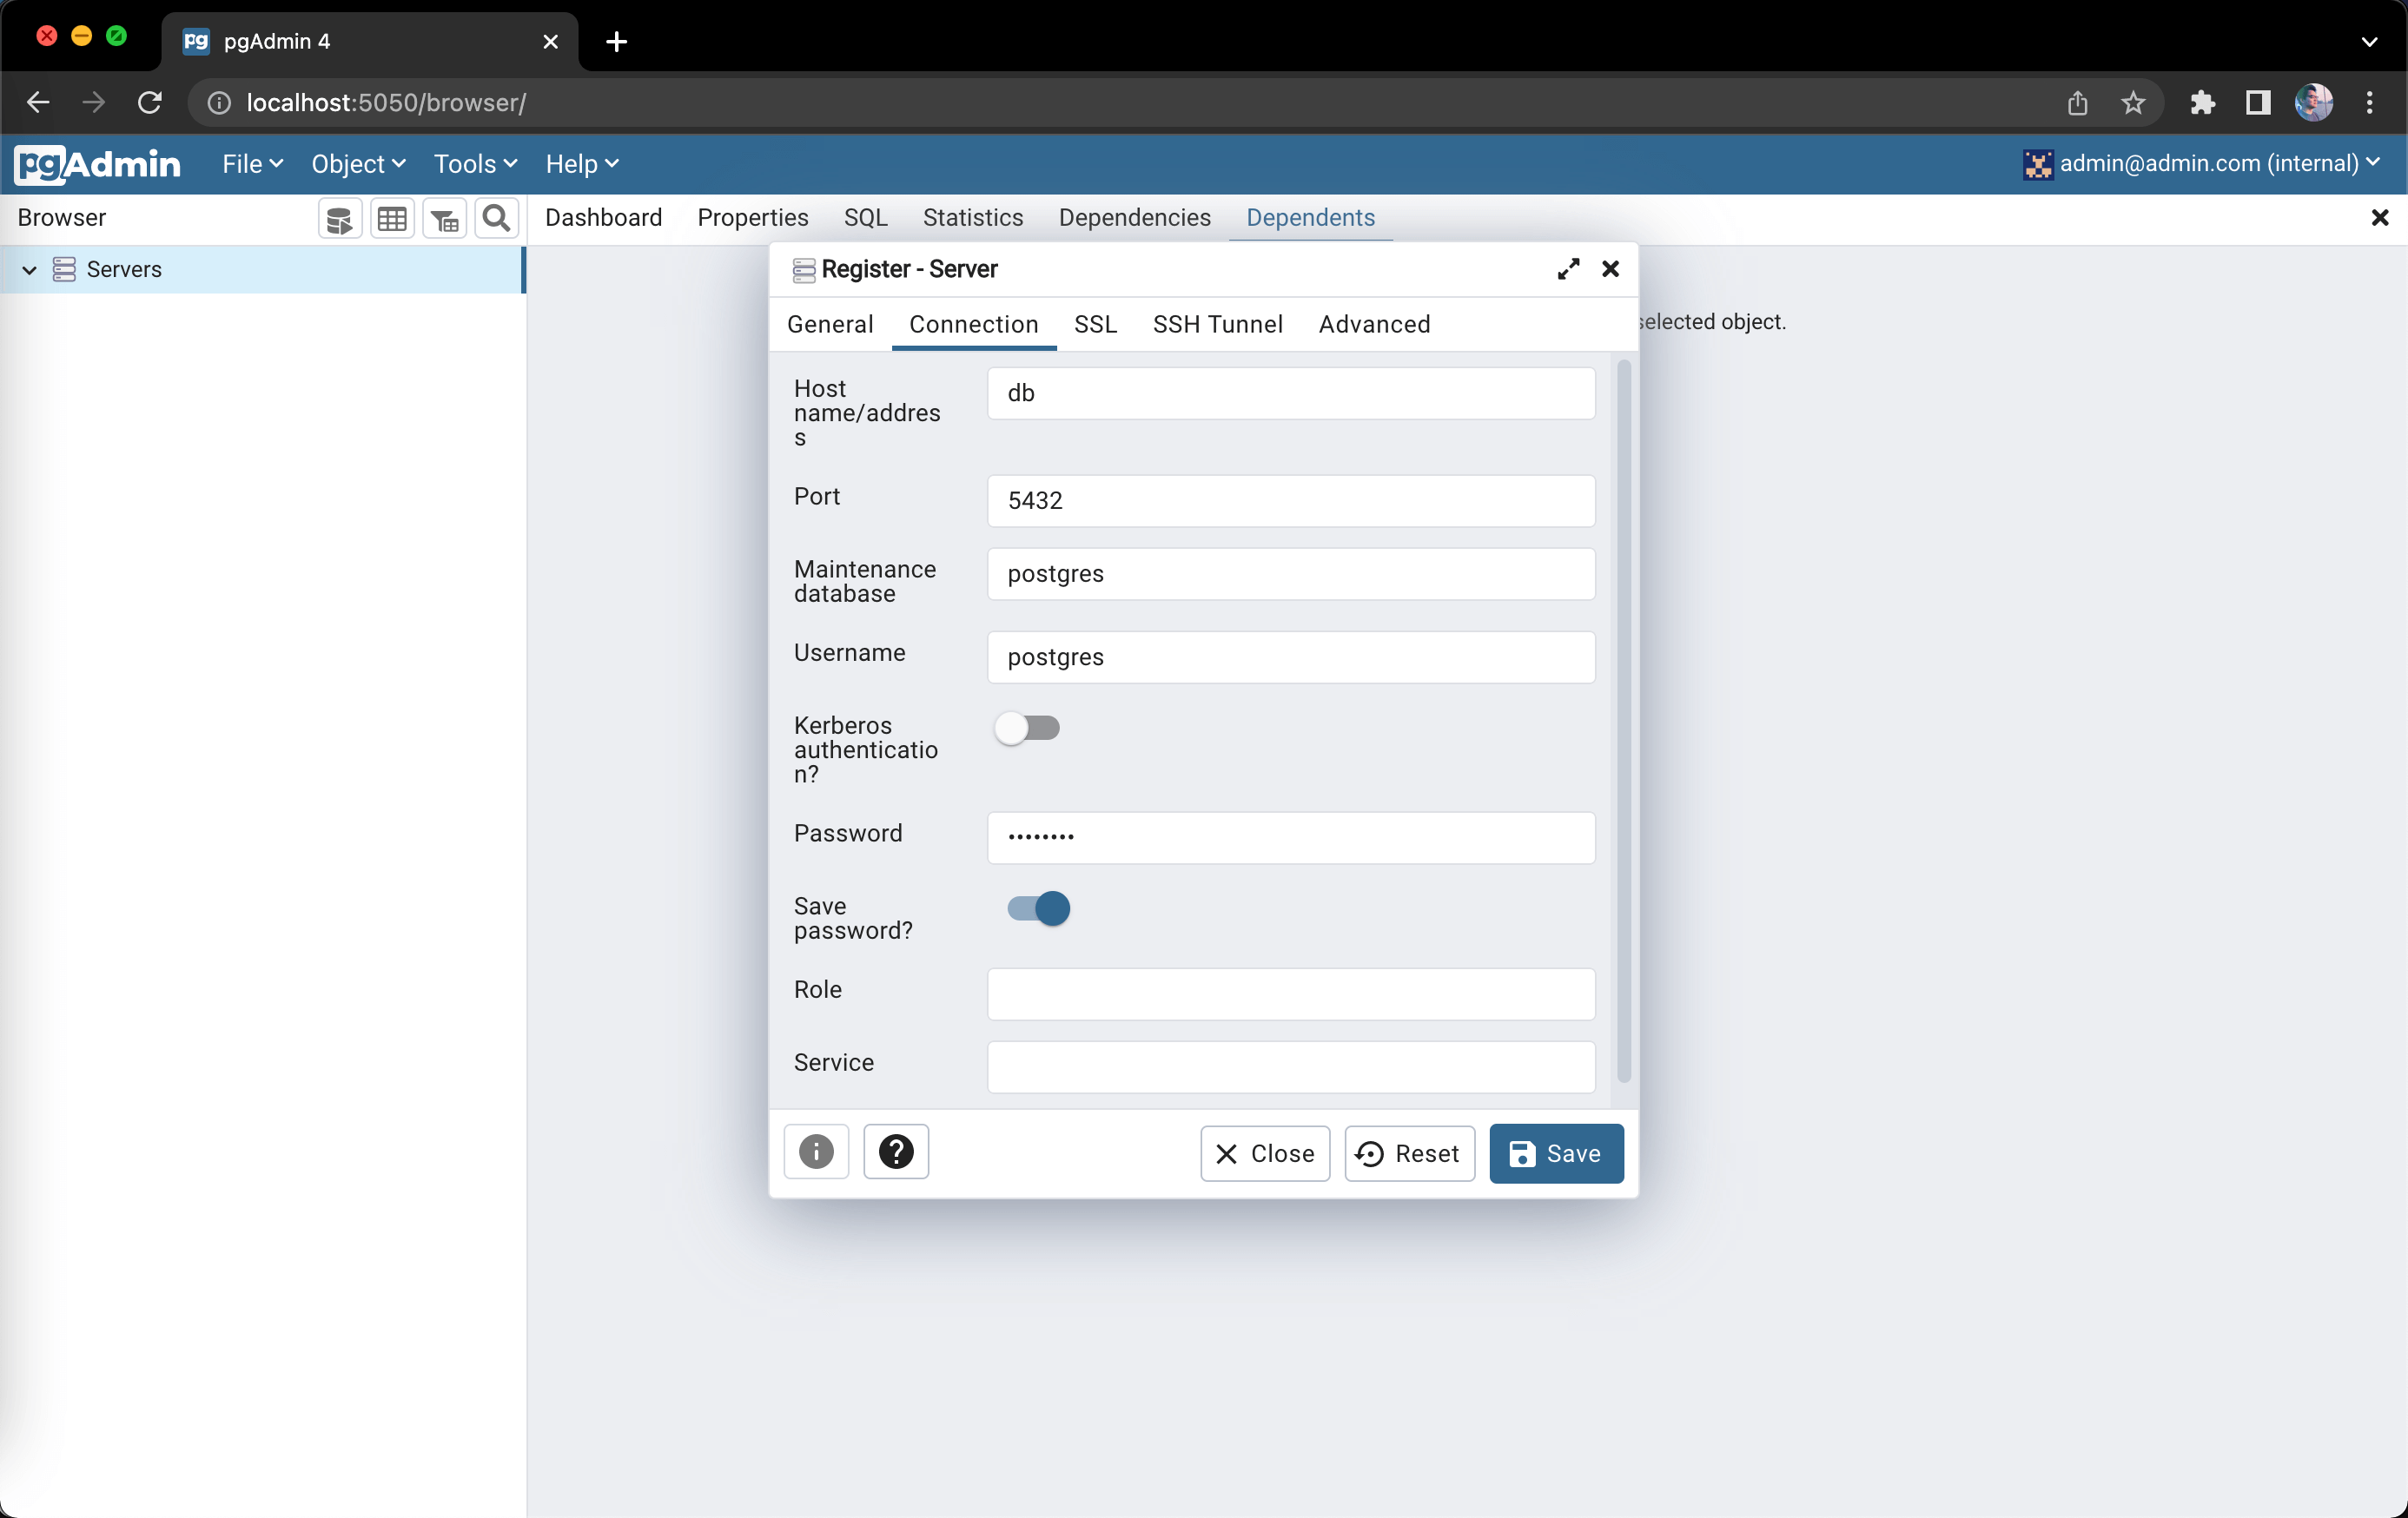
Hit "Save" and if there was no error means that our pgAdmin4 was able to connect to our PostgreSQL database successfully. The "Nest Docker" would be added under the "Servers", and you can go through that to see and interact with the database. Here's how you can go to the tables: Servers -> Nest Docker -> postgres -> Schemas -> public -> Tables.
TypeORM
Let's continue and set up a database connection to our Nest application. We'll be using TypeORM which is an ORM that can help us develop any kind of application that uses databases in a JavaScript or TypeScript friendly way to communicate to the database rather than sending plain queries directly. It also handles a lot of things automatically such as database handling, data types, relations, etc. It also has database abstraction and they support a number of databases, that means we're not tied to a specific database, we can use PostgreSQL now and maybe use MongoDB tomorrow by just changing the configuration when initializing TypeORM and minor changes to the shape of your entities.
To use TypeORM in Nest. First, install the following dependencies:
yarn add @nestjs/typeorm typeorm@0.2 pg
Note that we're using TypeORM v0.2, which isn't the latest version of TypeORM. The latter has substantial modifications and duplicate methods which are used on this post. You can read about typeorm@0.3.0 changes on their repository.
When installing typeorm@0.2, you might need to move @types/node from devDependencies to dependencies as a workaround for this error.
yarn remove @types/node
yarn add @types/node
Once the installation process is complete, we can import the TypeOrmModule into the root AppModule in src/app.module.ts and configure the database connection:
...
import { TypeOrmModule } from '@nestjs/typeorm';

@Module({
  imports: [
    TypeOrmModule.forRoot({
      type: 'postgres',
      host: 'db',
      port: 5432,
      username: 'postgres',
      password: 'postgres',
      database: 'postgres',
      autoLoadEntities: true,
      synchronize: true,
    }),
  ],
  ...
})
export class AppModule {}
Once you save the changes and run our application again, it should be all "green" in the terminal logs and that means the connection of the Nest application to our database is successful. Let's verify this by creating a Users module along with the controller and service using Nest CLI.
nest g module users
nest g controller users --no-spec
nest g service users --no-spec
Next, we need to create an entity for User. In TypeORM, an entity is a class that maps to a database table (or collection when using MongoDB). Create a file src/users/user.entity.ts and add the following code:
import { Column, Entity, PrimaryGeneratedColumn } from 'typeorm';

@Entity()
export class User {
  @PrimaryGeneratedColumn()
  id: number;

  @Column()
  firstName: string;

  @Column()
  lastName: string;

  @Column({ default: true })
  isActive: boolean;
}
TypeORM supports the repository design pattern, so each entity has its own repository. These repositories can be obtained from the database connection.
To begin using the User entity, we need to let TypeORM know about it by inserting it into the array in the module forFeature() method argument and import it in the users module src/users/users.module.ts:
...
import { TypeOrmModule } from '@nestjs/typeorm';
import { User } from './user.entity';

@Module({
  imports: [TypeOrmModule.forFeature([User])],
  ...
})
export class UsersModule {}
The user module uses the forFeature() method to define which repositories are registered in the current scope. With that in place, we can inject the UsersRepository into the UsersService using the @InjectRepository() decorator in src/users/users.service.ts:
import { Injectable } from '@nestjs/common';
import { InjectRepository } from '@nestjs/typeorm';
import { Repository } from 'typeorm';
import { User } from './user.entity';

@Injectable()
export class UsersService {
  constructor(
    @InjectRepository(User) private usersRepository: Repository<User>
  ) {}

  getAllUsers(): Promise<Array<User>> {
    return this.usersRepository.find({});
  }
}
Now to expose a GET request handler in our application to get all the users, let's update our users controller src/users/users.controller.ts:
import { Controller, Get } from '@nestjs/common';
import { User } from './user.entity';
import { UsersService } from './users.service';

@Controller('users')
export class UsersController {
  constructor(private usersService: UsersService) {}

  @Get()
  getAllUsers(): Promise<Array<User>> {
    return this.usersService.getAllUsers();
  }
}
You can open your Postman API client (or simply open your browser) and do a GET request to http://localhost:3000/users.
It should return a status of 200 OK and return you an empty array [].
If you still don't trust it, create a new row in our user table using pgAdmin4.
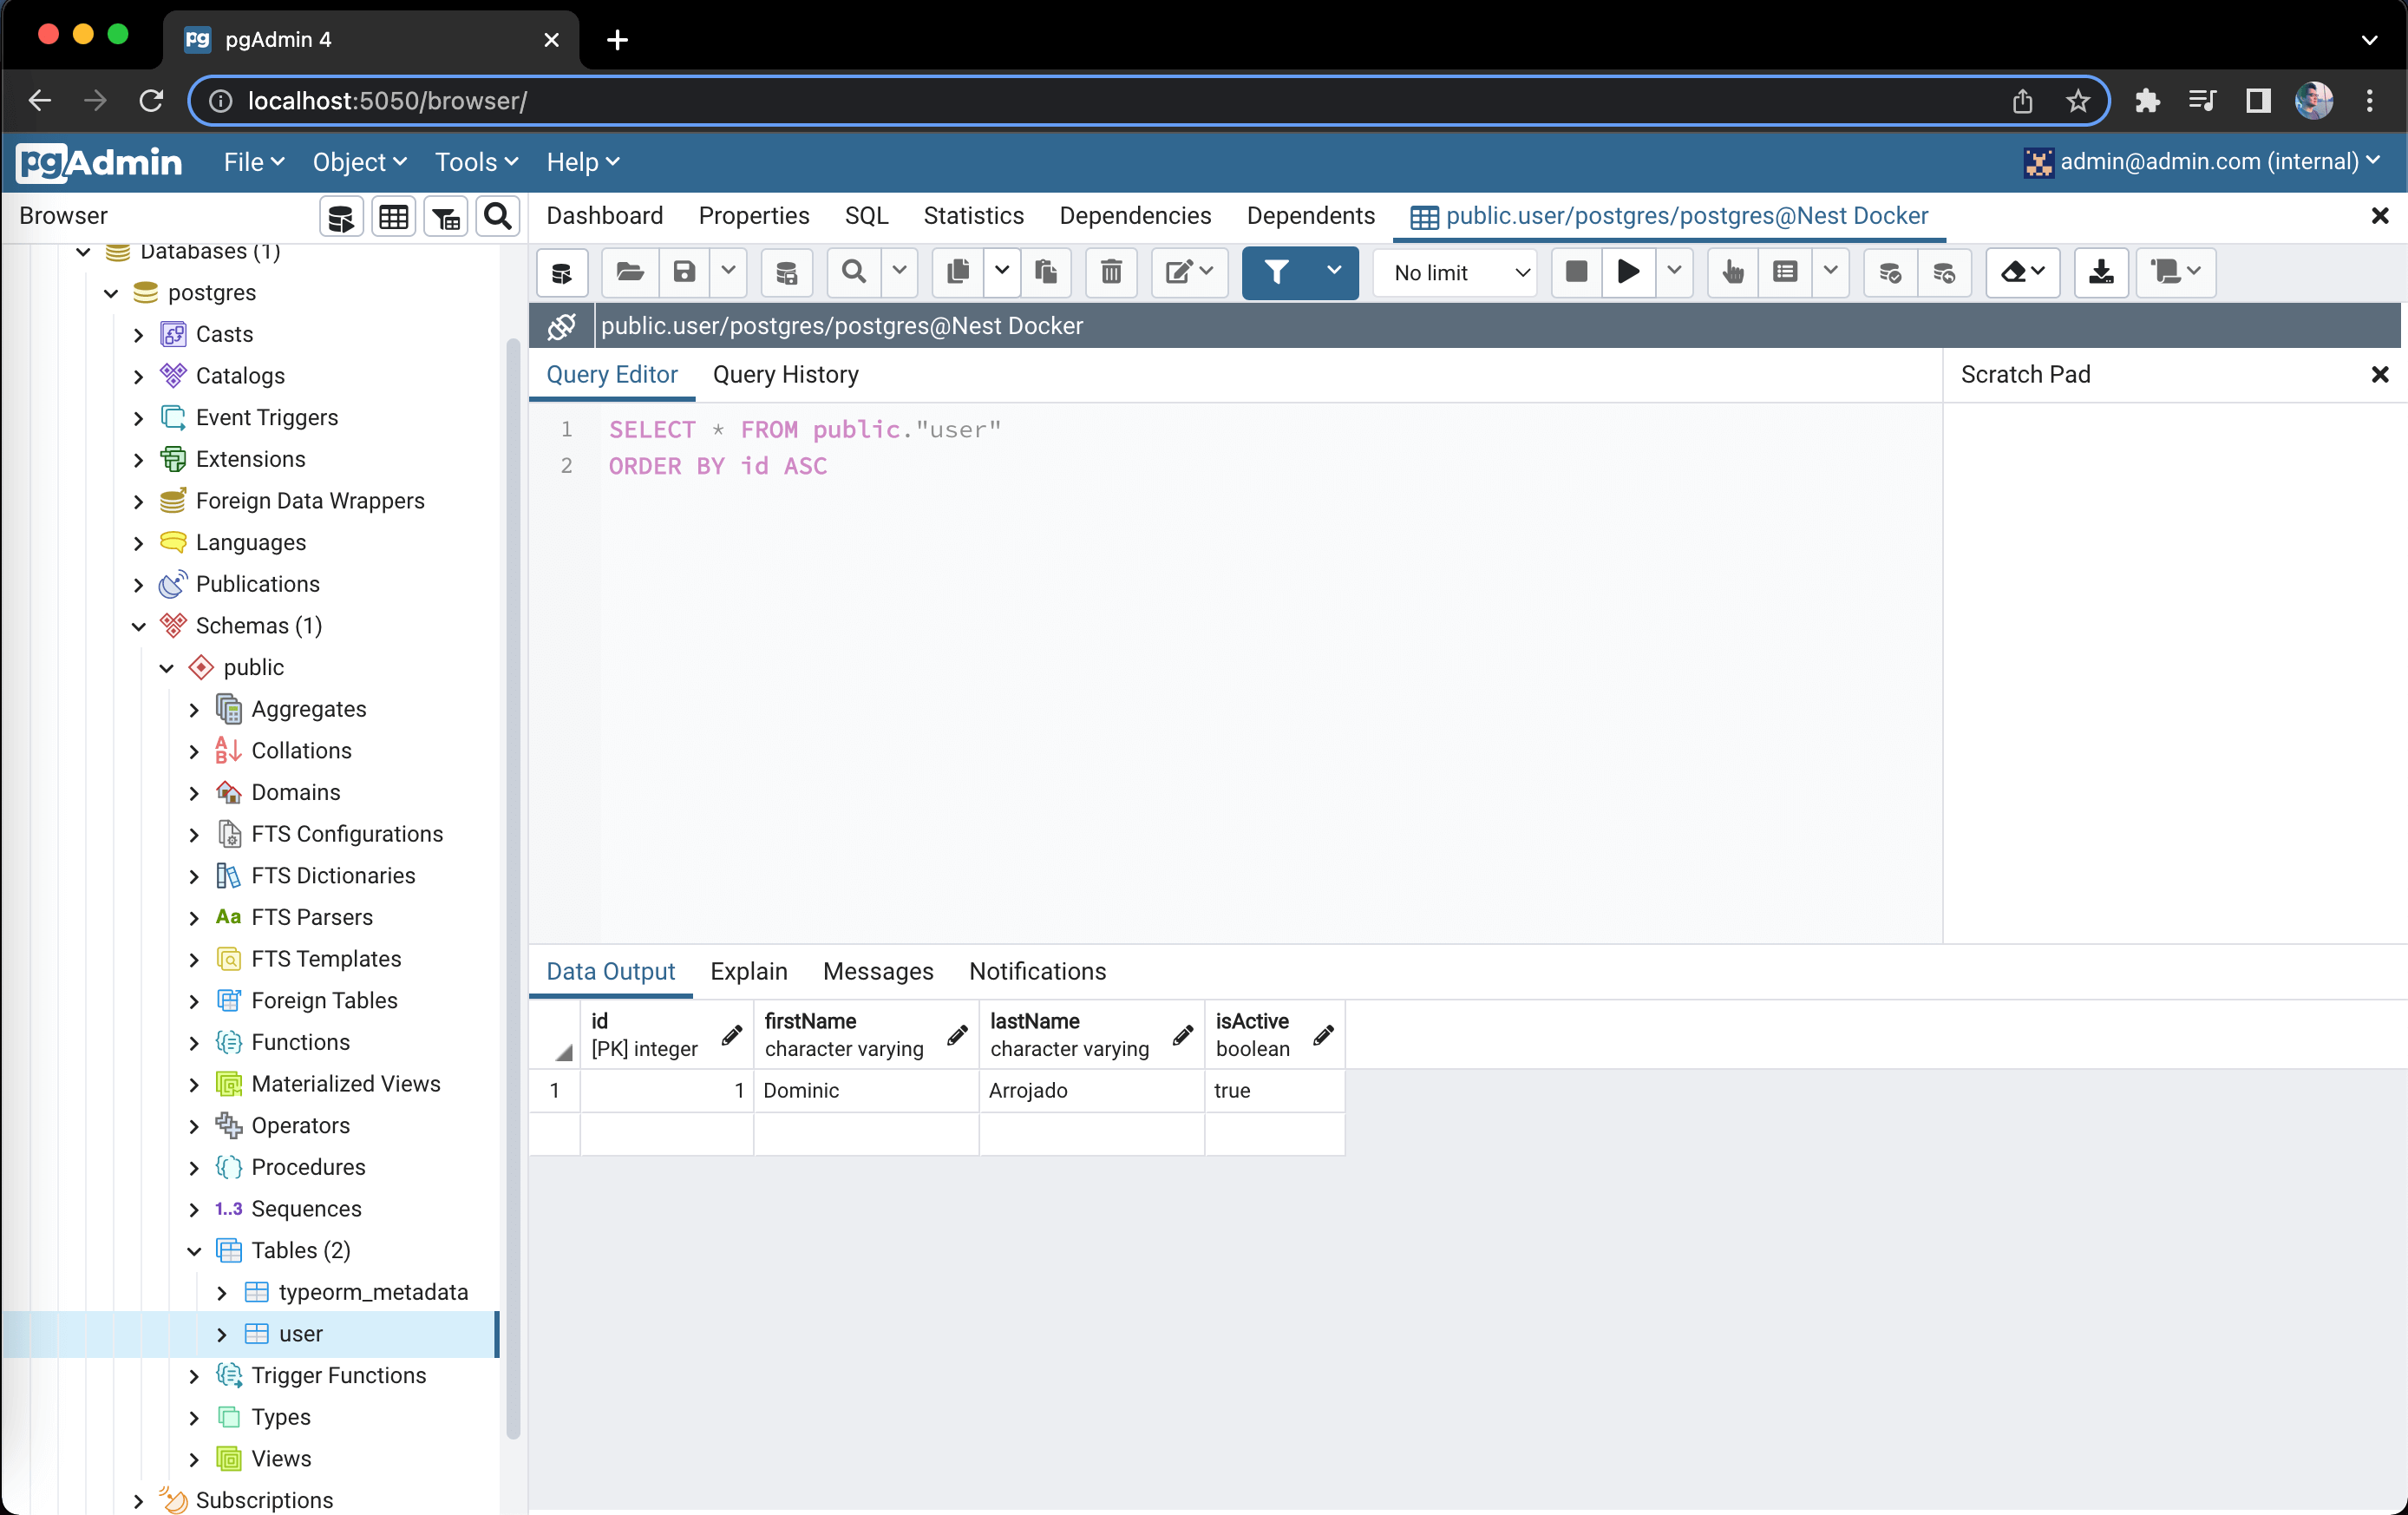
And if you repeat the same GET request, it should now return you an array with the user object:
[{ "id": 1, "firstName": "Dominic", "lastName": "Arrojado", "isActive": true }]
ConfigModule
There's another thing we need to do, so remember the values we used in initializing TypeOrmModule, passing configuration settings such as host, port, username, etc. Applications often run in different environments. Depending on the environment, different configuration settings should be used. Best practice is to store configuration variables in the environment.
In Node.js applications, it's common to use .env files, holding key-value pairs where each key represents a particular value, to represent each environment. Running an app in different environments is then just a matter of swapping in the correct .env file.
A good approach for using this technique in Nest is to create a ConfigModule that exposes a ConfigService which loads the appropriate .env file. While you may choose to write such a module yourself, for convenience Nest provides the @nestjs/config package out-of-the box.
To begin using it, let's install the required dependency:
yarn add @nestjs/config cross-env
Then head over to src/app.module.ts and import the ConfigModule here:
...
import { ConfigModule, ConfigService } from '@nestjs/config';

@Module({
  imports: [
    ConfigModule.forRoot({
      envFilePath: [`stage.${process.env.STAGE}.env`],
    }),
    TypeOrmModule.forRootAsync({
      imports: [ConfigModule],
      inject: [ConfigService],
      useFactory: async (configService: ConfigService) => {
        return {
          type: 'postgres',
          host: configService.get('DB_HOST'),
          port: configService.get('DB_PORT'),
          username: configService.get('DB_USERNAME'),
          password: configService.get('DB_PASSWORD'),
          database: configService.get('DB_DATABASE'),
          autoLoadEntities: true,
          synchronize: true,
        };
      },
    }),
    UsersModule,
  ],
  ...
})
export class AppModule {}
In order to use the ConfigModule when initializing the TypeOrmModule, we'll need to switch from using forRoot to forRootAsync and take advantage of the dependency injection as written above.
We'll be using STAGE from the environment variables as the definition on which .env file will be loaded. Go ahead and create stage.dev.env and add the following config (you can create a file stage.prod.env later when you're ready to deploy your application to production):
PORT=3000
DB_HOST=db
DB_PORT=5432
DB_USERNAME=postgres
DB_PASSWORD=postgres
DB_DATABASE=postgres
Then update package.json to include STAGE environment variable depending on the script:
{
  "name": "my-app",
  ...
  "scripts": {
    ...
    "start:dev": "cross-env STAGE=dev nest start --watch",
    "start:debug": "cross-env STAGE=dev nest start --debug --watch",
    "start:prod": "cross-env STAGE=prod node dist/main",
    ...
    "test": "cross-env STAGE=dev jest",
    "test:watch": "cross-env STAGE=dev jest --watch",
    "test:cov": "cross-env STAGE=dev jest --coverage",
    ...
  },
  ...
}
Here we are using cross-env which allows us to have a single command without worrying about setting or using the environment variable properly depending on the platform (e.g. Windows, MacOS, Linux).
Let's also update main.ts to use the PORT from the environment variables:
import { Logger } from '@nestjs/common';
import { NestFactory } from '@nestjs/core';
import { AppModule } from './app.module';

async function bootstrap() {
  const logger = new Logger();
  const app = await NestFactory.create(AppModule);
  const port = process.env.PORT;

  await app.listen(port);

  logger.log(`Application listening on port ${port}`);
}
bootstrap();
Run the Docker Compose environments again and everything should work fine as before.
Config schema validation
It is standard practice to throw an exception during application startup if required environment variables haven't been provided or if they don't meet certain validation rules. The @nestjs/config package enables two different ways to do this as mentioned here. Joi is one of them which is what we're going to use.
To use Joi, we must install Joi package:
yarn add joi
Next, create the file src/config.schema.ts in the root folder with the following content:
import * as Joi from 'joi';

export const configValidationSchema = Joi.object({
  STAGE: Joi.string().required(),
  PORT: Joi.number().default(3000).required(),
  DB_HOST: Joi.string().required(),
  DB_PORT: Joi.number().default(5432).required(),
  DB_USERNAME: Joi.string().required(),
  DB_PASSWORD: Joi.string().required(),
  DB_DATABASE: Joi.string().required(),
});
Then let's make use of this by passing it in the ConfigModule option validationSchema in src/app.module.ts:
...
import { configValidationSchema } from './config.schema';

@Module({
  imports: [
    ConfigModule.forRoot({
      envFilePath: [`stage.${process.env.STAGE}.env`],
      validationSchema: configValidationSchema,
    }),
    ...
  ],
  ...
})
export class AppModule {}
That's all you need to do. Try removing DB_USERNAME in stage.dev.env and run the Docker Compose environments. You'll get an error in the end stating: Error: Config validation error: "DB_USERNAME" is required. That's really helpful for knowing what went wrong while trying to run your application instead of getting a generic error Unable to connect to the database if we didn't do the config schema validation otherwise.
Production and test environments
To finish off our local development setup, we want to be able to run tests using Docker Compose as well.
First, let's update the Dockerfile to include the 3 scripts that runs the test:
...
CMD [ "yarn", "start:dev" ]

FROM dev AS test
ENV NODE_ENV=test
CMD [ "yarn", "test" ]

FROM test AS test-cov
CMD [ "yarn", "test:cov" ]

FROM test AS test-watch
ENV GIT_WORK_TREE=/app GIT_DIR=/app/.git
RUN apk add git
CMD [ "yarn", "test:watch" ]

FROM base AS prod
...
Note that for test:watch to know what has changed within the application code, it relies on git, so we had some additional instructions for it.
Let's create production.yml in the root folder with the following content:
services:
  app:
    build:
      target: prod
It doesn't contain much as we only want to change the target because this will be appended to the original docker-compose.yml.
Then create test.yml in the root folder with the following content:
services:
  app:
    build:
      target: test
Then create test-cov.yml in the root folder with the following content:
services:
  app:
    build:
      target: test-cov
    volumes:
      - ./coverage:/app/coverage
You should already be familiar with volumes. Here, we are basically syncing the coverage folder so that the coverage files generated from the application container will be synced with our current directory. Useful for CI/CD where you need to upload the test coverage to a service such as codecov.
Then create test-watch.yml in the root folder with the following content:
services:
  app:
    build:
      target: test-watch
    volumes:
      - .git:/app/.git/
Same as above. Here, we are syncing the .git folder from our current directory with the .git folder of the application container. That is how it will know what files were changed in the application code and only run the test related to those changes.
Let's also move the dbadmin service block from docker-compose.yml to a new separate file called dbadmin.yml as it will only be utilized during development but we don't need that service when we're just running tests.
services:
  dbadmin:
    image: dpage/pgadmin4
    restart: always
    ports:
      - 5050:80
    environment:
      PGADMIN_DEFAULT_EMAIL: admin@admin.com
      PGADMIN_DEFAULT_PASSWORD: pgadmin4
The updated docker-compose.yml should look like this now:
version: '3.9'
services:
  app:
    build:
      context: .
      dockerfile: Dockerfile
      target: dev
    ports:
      - 3000:3000
    volumes:
      - ./src:/app/src
    depends_on:
      - db

  db:
    image: postgres
    restart: always
    ports:
      - 5432:5432
    environment:
      POSTGRES_PASSWORD: postgres
Lastly, update the package.json to add new scripts and utilize these new Docker Compose targets:
{
  "name": "my-app",
  ...
  "scripts": {
    "test": "cross-env STAGE=dev jest --runInBand",
    "test:watch": "cross-env STAGE=dev jest --runInBand --watch",
    "test:cov": "cross-env STAGE=dev jest --runInBand --coverage",
    ...
    "docker-compose:dev": "docker-compose -f docker-compose.yml -f dbadmin.yml up --build",
    "docker-compose:test": "docker-compose -f docker-compose.yml -f test.yml up --build --exit-code-from app",
    "docker-compose:test:cov": "docker-compose -f docker-compose.yml -f test-cov.yml up --build --exit-code-from app",
    "docker-compose:test:watch": "docker-compose -f docker-compose.yml -f test-watch.yml up --build",
    "docker-compose:prod": "docker-compose -f docker-compose.yml -f production.yml -f dbadmin.yml up --build",
    "docker-compose:prod:build-only": "docker-compose -f docker-compose.yml -f production.yml build"
  },
  ...
}
In the changes, we added --runInBand parameter to the scripts test, test:watch and test:cov found in package.json. This is done so we can run all tests serially for end-to-end testing that interacts with a database in docker compose, we don't want two or more test cases running in parallel where there's only 1 database as it might affect expected test results.
Also, with the -f option, we are able to use a second configuration file along with the original docker-compose.yml. For docker-compose:test and docker-compose:test:cov, we have a special option --exit-code-from, that's because we don't want the services in the Docker Compose to keep running even after completing all the tests, so we should ideally exit from app, which is the name of our Nest application container in the docker-compose.yml, and stop all the services.
Final words
Well, there you have it! You now have a full-fledged local development setup. Go ahead and start coding your Nest applications from this setup! I hope this was helpful for you, do share this post if you feel that it will be helpful for someone else too. By the way, I did a post on how to build an application using NestJS framework leveraging this setup in case you're interested. Thanks for reading ~