Introduction
One of my favorite features that React introduced is React Hooks. They let you use state and other React features without writing a class. I personally feel that it is cleaner, more readable and much easier to build React components and features with it. Using React Hooks, you can build your own custom hooks on top of it. One of the custom hooks that I usually create is the integration with a back-end server through a REST API, because when your front-end application interacts with an API, you would want to display the different states on your UI for users to know when it is loading, when it is successful, or when there's an error. It is also good to separate your custom hooks from your components to make it reusable and it also makes it easier to write tests for them. Follow me along as I build a simple custom API hook using React and TypeScript, as well as write tests for it using Jest and Testing Library.
Prerequisites
This is the link to the web application which we'll accomplish by the end of this post, you can see and play around with it or use it as your reference throughout this tutorial.
Upon writing this post, I assume that you have some web development background and basic knowledge regarding npm, yarn, HTML, CSS, JavaScript and React.
Fastest way to start a new project with React is using the Create React App. It is an officially supported way to create single-page React applications. It offers a modern build setup with no configuration so you can focus on code, not build tools.
To create our project with React and TypeScript, run this command in your terminal:
yarn create react-app react-typescript-api-hooks --template typescript
Once project is initiated, install the additional libraries which we'll be using later on:
cd react-typescript-api-hooks
yarn add axios @testing-library/react-hooks faker@5.5.3 @types/faker@5.5.9
To run our project, execute the command below:
yarn start
We'll also be using JSONPlaceholder - Free Fake REST API for this tutorial as our back-end server.
Knowing your API
Before we start creating our custom API hook, it is good to know the details about the API that we'll be integrating with the UI.
We'll be using a simple GET API that returns a list of posts from JSONPlaceholder. You can check it out here and the output would be something like this:
[
  { id: 1, title: '...' /* ... */ },
  { id: 2, title: '...' /* ... */ },
  { id: 3, title: '...' /* ... */ },
  /* ... */
  { id: 100, title: '...' /* ... */ },
];
Create the type
To get started, let's create an enum for the different states our UI will go through as it fetches data from the API. Enums allows us to define a set of named constants. It can make it easier to document intent, or create a set of distinct cases.
// src/types.ts

export enum FetchState {
  DEFAULT = 'DEFAULT',
  LOADING = 'LOADING',
  SUCCESS = 'SUCCESS',
  ERROR = 'ERROR',
}
Next, in the same file, let's also add the type of the data we are expecting from the API response. It is necessary to do this as TypeScript wouldn't be able to know what is the type of the data our API will return.
...

export type PostData = {
  userId: number;
  id: number;
  title: string;
  body: string;
};
Create the custom API hook
Now, we're ready to write our custom API hook. Type the following code below:
// src/lib/api-hooks.ts

import axios from 'axios';
import { useState } from 'react';
import { FetchState, PostData } from '../types';

export function useGetPosts() {
  const [fetchState, setFetchState] = useState(FetchState.DEFAULT);
  const [posts, setPosts] = useState<Array<PostData>>([]);
  const getPosts = async () => {
    try {
      setFetchState(FetchState.LOADING);

      const res = await axios.get('https://jsonplaceholder.typicode.com/posts');
      const resData = res.data as Array<PostData>;

      setPosts(resData);
      setFetchState(FetchState.SUCCESS);
    } catch (err) {
      setFetchState(FetchState.ERROR);
    }
  };

  return [posts, fetchState, getPosts] as const;
}
We created 2 states, one is for the FetchState, which we can use in our React component to show different states of the UI. The other state is for storing the array of PostData which we can loop through and display one-by-one in the UI.
You might notice in the code we have this:
...
  const [posts, setPosts] = useState<Array<PostData>>([]);
...
This is how we define type for the useState. In most cases, if our data is using simple types like string, number or boolean, we don't have to define the type. If you remove <Array<PostData>>, the type of posts would then be Array<never>, that's not really helpful for us because TypeScript doesn't know what data we expect inside the array. For complicated types such as this, we would need to define the type of the state.
You may ask, why didn't we do the same for fetchState. That's because if the initial value of the state is using an enum, in this case FetchState.DEFAULT, TypeScript would then assume that it can only accept values from FetchState which is often true.
Another thing to take note, we also had to do type assertion for the res.data returned from the API, we can safely do so because we have the knowledge and expectation that the API would always return an array of PostData. Without it, TypeScript would give it a type of any which will again not be helpful for us.
At the last part of the code, we added as const for the returned array to tell TypeScript that this is a read-only array.
Use the custom API hook in a component
Now let's put our custom API hook into action by using it in a component. Let's update our App.tsx code with the following below:
// src/App.tsx
import { useGetPosts } from './lib/api-hooks';
import { FetchState } from './types';
import './App.css';
function App() {
const [posts, fetchState, getPosts] = useGetPosts();
return (
<div className="container">
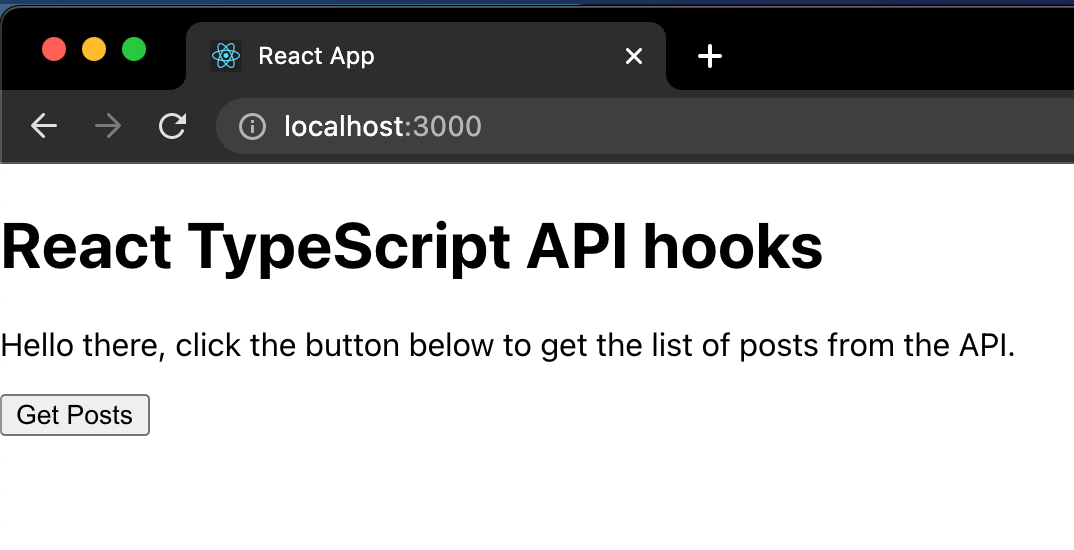
<h1>React TypeScript API hooks</h1>
{fetchState === FetchState.DEFAULT && (
<>
<p>
Hello there, click the button below to get the list of posts from
the API.
</p>
<button onClick={getPosts}>Get Posts</button>
</>
)}
{fetchState === FetchState.LOADING && <p>Fetching posts...</p>}
{fetchState === FetchState.ERROR && (
<>
<p>Oops! Something went wrong. Please try again.</p>
<button onClick={getPosts}>Get Posts</button>
</>
)}
{fetchState === FetchState.SUCCESS && (
<>
<p>Here's the list of posts:</p>
<ul className="posts-list">
{posts.map((post) => (
<li key={post.id} className="post">
<h3>
{post.id} - {post.title}
</h3>
<p>{post.body}</p>
</li>
))}
</ul>
</>
)}
</div>
);
}
export default App;
Once you saved it, your React application should display something like this:
Now before we interact with it, let's update the styles to make our application slightly prettier.
/* src/index.css */

* {
  box-sizing: border-box;
}

body {
  margin: 0;
  font-family: -apple-system, BlinkMacSystemFont, 'Segoe UI', 'Roboto',
    'Oxygen', 'Ubuntu', 'Cantarell', 'Fira Sans', 'Droid Sans',
    'Helvetica Neue', sans-serif;
  -webkit-font-smoothing: antialiased;
  -moz-osx-font-smoothing: grayscale;
  line-height: 1.6;
}
/* src/App.css */

.container {
  width: 600px;
  max-width: 100%;
  margin: 0 auto;
  padding: 20px 15px;
}

.posts-list {
  list-style: none;
  padding: 0;
  margin: 0;
}

.post {
  margin-top: 10px;
  padding: 0 15px;
  border: 1px solid #ccc;
}

.post h3 {
  color: #222;
}

.post p {
  color: #777;
}
Alright, now try clicking the "Get Posts" button. You should briefly see the loading state:

Then eventually the list of posts:
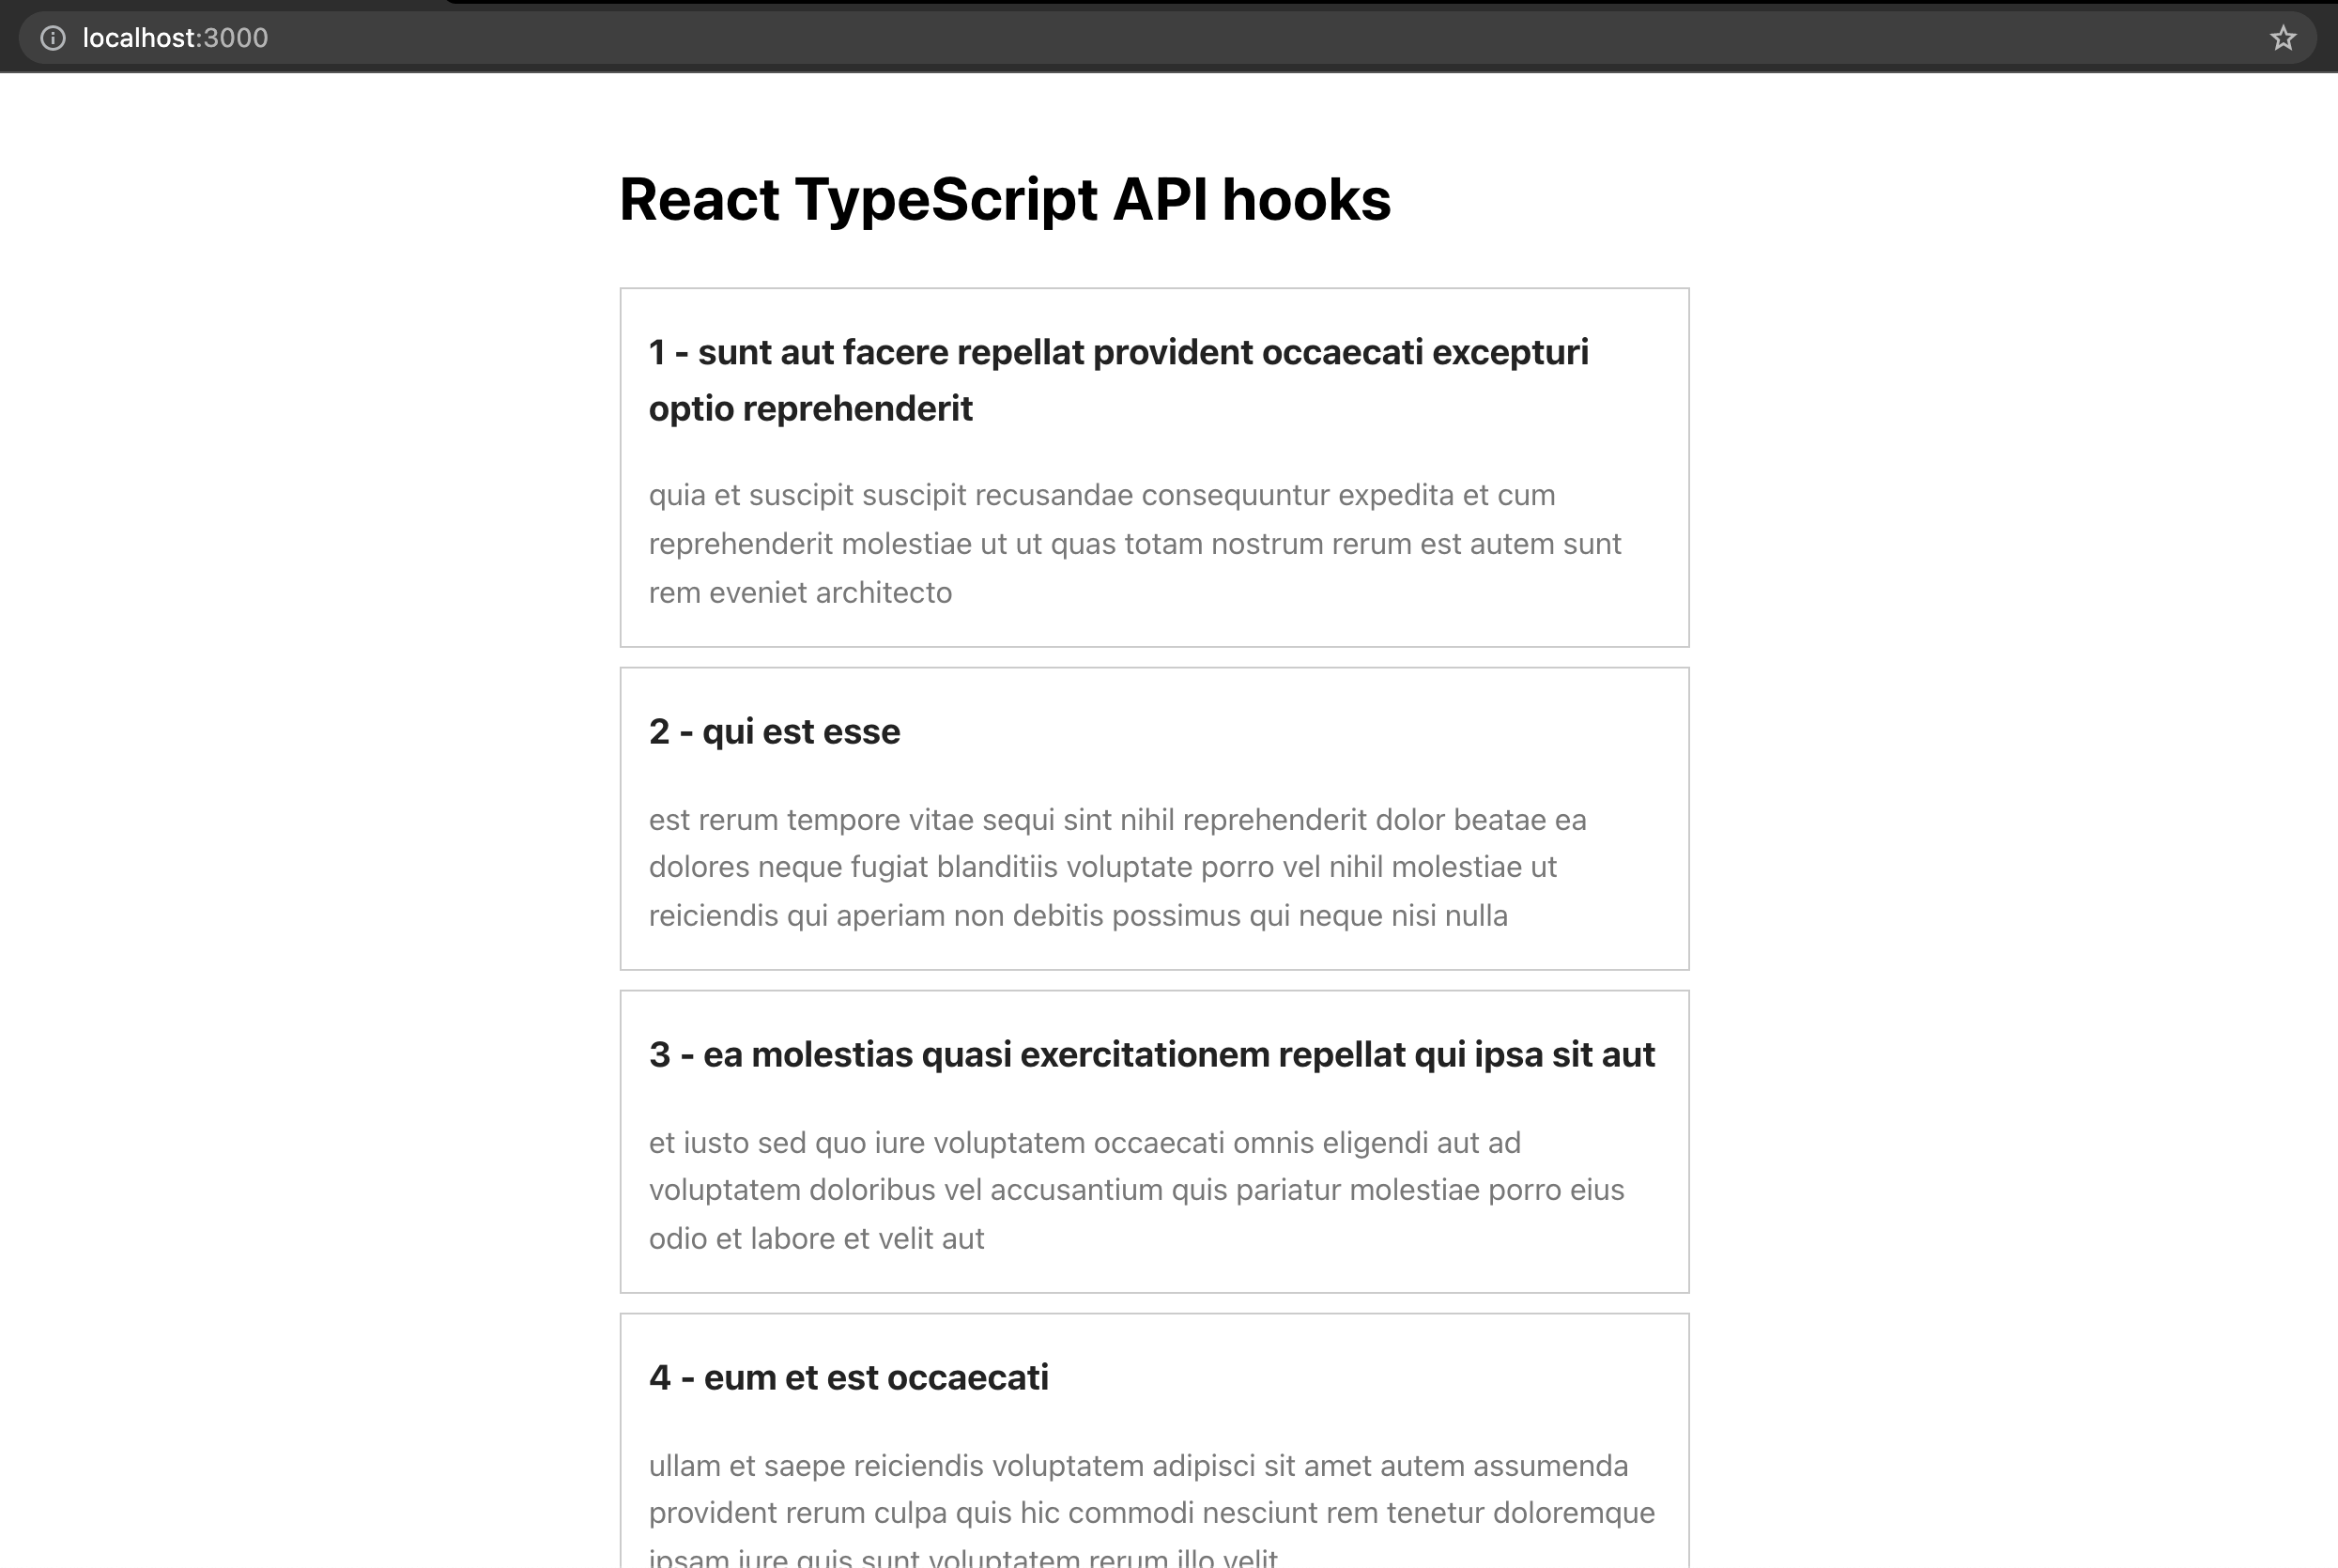
Alright, everything is working fine as expected.
If you would like to see the error state. Simple add a throw inside the getPosts function like this:
...
  const getPosts = async () => {
    try {
      throw new Error(); // TODO: remove this after seeing the error state
      ...
    } catch (err) {
      ...
    }
  };
When you click the "Get Posts" button again. It will display something like this:
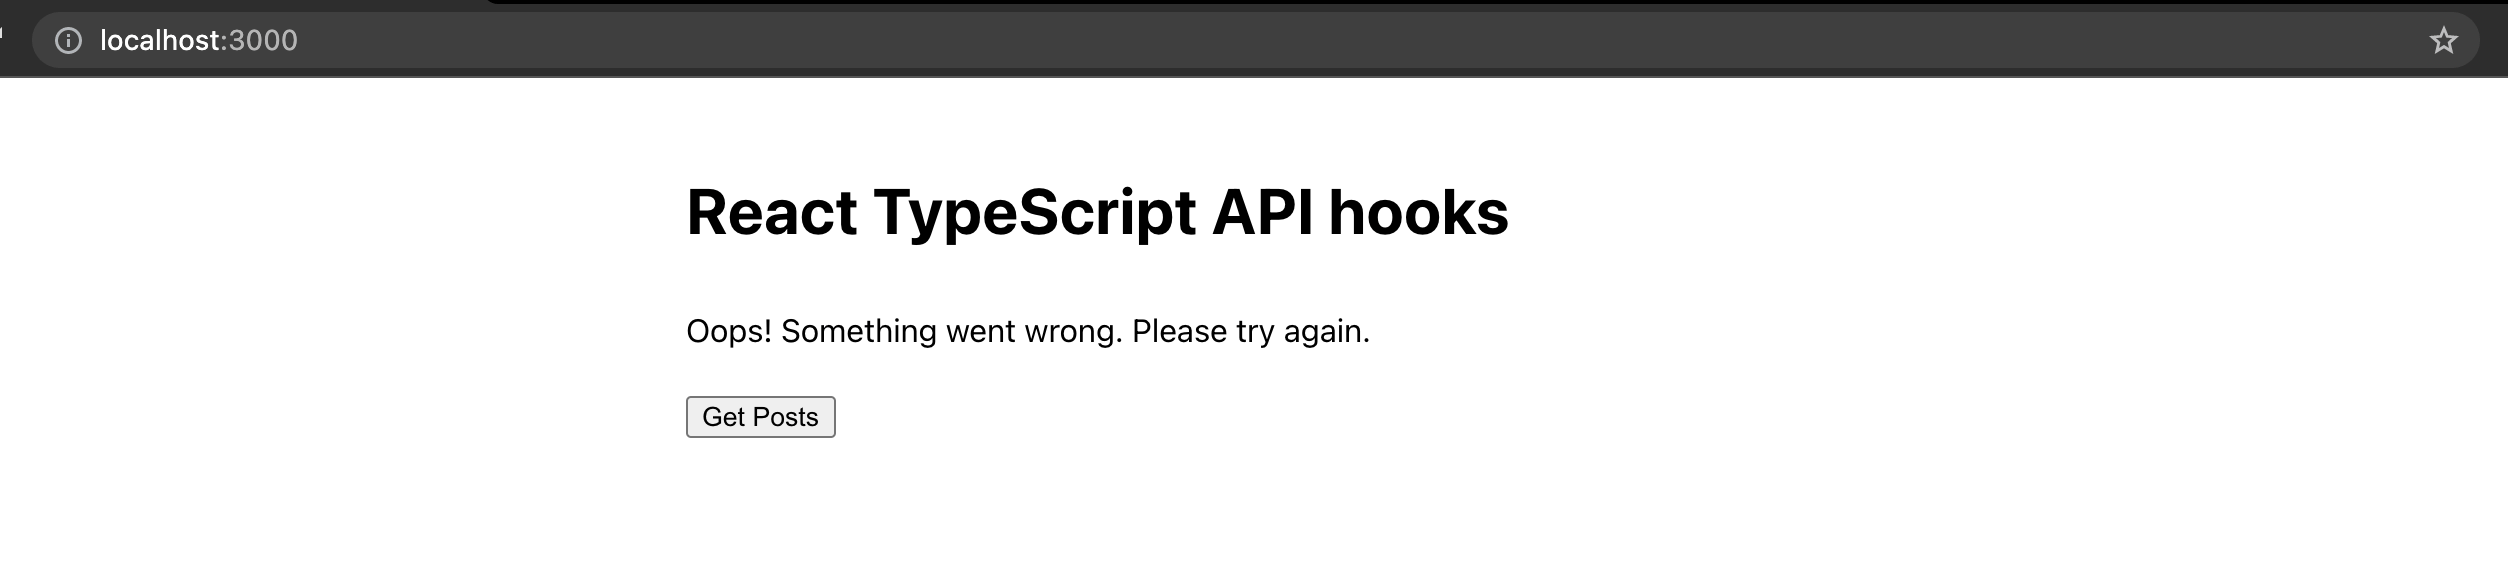
Awesome! Remove the throw code and we can start writing tests.
Write tests for App component
Update the code of App.test.tsx for our first test case which is to check the default state:
// src/App.test.tsx

import { render, screen } from '@testing-library/react';
import App from './App';

describe('<App />', () => {
  const renderComponent = () => render(<App />);
  const defaultText =
    'Hello there, click the button below to get the list of posts from the API.';
  const loadingText = 'Fetching posts...';
  const errorText = 'Oops! Something went wrong. Please try again.';
  const successText = "Here's the list of posts:";

  it('should render default state', () => {
    renderComponent();

    const stateEl = screen.queryByText(defaultText);

    expect(stateEl).toBeInTheDocument();
  });
});
Here we define all the expected descriptions for each state and check whether an element with a text of defaultText is in the document.
To see if our test case passed along with the coverage, run this command on your terminal:
yarn test --coverage
You don't have to run this command again when you make changes, it will automatically re-run just like yarn start.
For the second test case, let's check whether the description is correct during the loading state. We will have to mock the useGetPosts() in order to control the state it returns and do the checks. This also ensures that we are not doing an actual fetch to the API. Mocking data fetching with "fake" data prevents flaky tests due to an unavailable back-end server and makes our tests run faster too.
// src/App.test.tsx

...
import * as apiHooks from './lib/api-hooks';
import { FetchState } from './types';

describe('<App />', () => {
  ...

  afterEach(() => {
    jest.restoreAllMocks();
  });

  ...

  it('should render loading state on loading', () => {
    const fetchState = FetchState.LOADING;

    jest
      .spyOn(apiHooks, 'useGetPosts')
      .mockReturnValue([[], fetchState, jest.fn()]);

    renderComponent();

    const stateEl = screen.queryByText(loadingText);

    expect(stateEl).toBeInTheDocument();
  });
});
When mocking functions, we would need to call jest.restoreAllMocks() after each test using afterEach to revert it back to its original state to prevent it from affecting other test cases.
Let's add the code for the third test case to check the error state, it would be similar from the previous test case:
  ...

  it('should render error state on error', () => {
    const fetchState = FetchState.ERROR;

    jest
      .spyOn(apiHooks, 'useGetPosts')
      .mockReturnValue([[], fetchState, jest.fn()]);

    renderComponent();

    const stateEl = screen.queryByText(errorText);

    expect(stateEl).toBeInTheDocument();
  });
});
Next, for the fourth test case, we will check whether both the expected description is rendered as well as the post data. We can make use of the library faker to generate random data for us which makes our test more reliable.
// src/App.test.tsx
import faker from 'faker';

  ...

  it('should render success state on success', () => {
    const fetchState = FetchState.SUCCESS;
    const posts = [
      {
        userId: faker.datatype.number(),
        id: faker.datatype.number(),
        title: faker.lorem.sentence(),
        body: faker.lorem.sentences(),
      },
    ];

    jest
      .spyOn(apiHooks, 'useGetPosts')
      .mockReturnValue([posts, fetchState, jest.fn()]);

    renderComponent();

    const stateEl = screen.queryByText(successText);
    const post = posts[0];
    const postTitle = `${post.id} - ${post.title}`;
    const postEl = screen.queryByText(postTitle);

    expect(stateEl).toBeInTheDocument();
    expect(postEl).toBeInTheDocument();
  });
});
For the last test case of App.tsx, we just need to check that the getPosts function from the custom hook is called when the "Get Posts" button is clicked. Add the following code below:
import { fireEvent, render, screen } from '@testing-library/react';
  ...

  it('should call API on button click', () => {
    const getPostsMock = jest.fn();

    jest
      .spyOn(apiHooks, 'useGetPosts')
      .mockReturnValue([[], FetchState.DEFAULT, getPostsMock]);

    renderComponent();

    const btnEl = screen.queryByText('Get Posts') as HTMLButtonElement;

    fireEvent.click(btnEl);

    expect(getPostsMock).toBeCalledTimes(1);
  });
We are using the fireEvent function by the Testing Library to fire a click event. It only accepts an element so we had to do a type assertion when querying the button element.
If you check the coverage on your terminal, it should be 100% now for App.tsx.
That's great! Now are the done with the component tests. Let's move on to write tests for our custom API hook.
Write tests for custom API hook
For the first test case, we just need to check that it returns the expected initial values and function. Add the following code below:
// src/lib/api-hooks.test.ts

import { renderHook } from '@testing-library/react-hooks';
import { FetchState } from '../types';
import { useGetPosts } from './api-hooks';

describe('api hooks utilities', () => {
  describe('useGetPosts()', () => {
    const renderCustomHook = () => renderHook(() => useGetPosts());

    it('should return initial value', () => {
      const hook = renderCustomHook();
      const [posts, fetchState, getPosts] = hook.result.current;

      expect(posts).toEqual([]);
      expect(fetchState).toBe(FetchState.DEFAULT);
      expect(typeof getPosts).toBe('function');
    });
  });
});
For the second test case, let's check whether it is calling the expected API endpoint when the function is executed.
import { act, renderHook } from '@testing-library/react-hooks';
import axios from 'axios';

    ...

    afterEach(() => {
      jest.restoreAllMocks();
    });

    ...

    it('should have expected endpoint on api call', async () => {
      const axiosGetSpy = jest
        .spyOn(axios, 'get')
        .mockResolvedValue({ data: [] });

      const hook = renderCustomHook();
      const getPosts = hook.result.current[2];

      await act(async () => {
        await getPosts();
      });

      expect(axiosGetSpy).toBeCalledTimes(1);
      expect(axiosGetSpy).toBeCalledWith(
        'https://jsonplaceholder.typicode.com/posts'
      );
    });
  ...
We are mocking the axios here to prevent doing an actual fetch. We also used the act function which makes sure all updates related to this action have been processed and applied to the DOM before we make any assertions. This is usually done when the function you executed in the test case makes an update on the React states. When also added async and await because getPosts() is an asynchronous function and ideally we should wait for it to be done before we do our checks.
For the third test case, we need to check whether we are getting the expected states on API call, we are expecting we will get a loading state while waiting for the API to return the response. Here's the code for that:
    ...

    it('should have expected states on api call', async () => {
      jest.spyOn(axios, 'get').mockResolvedValue({ data: [] });

      const hook = renderCustomHook();
      const getPosts = hook.result.current[2];

      const promiseAct = act(async () => {
        await getPosts();
      });

      const [posts, fetchState] = hook.result.current;

      expect(posts).toEqual([]);
      expect(fetchState).toBe(FetchState.LOADING);

      await promiseAct;
    });
  ...
As you would notice, we didn't do an await for the act function right away, we had to store it in a variable and do an await at the end because if we didn't, we would be getting FetchState.SUCCESS instead which is for a later test case.
For the fourth test case, we need to check whether we are getting the expected state when the API fails. Add the following code below to do so:
    ...

    it('should have expected states on api error', async () => {
      jest.spyOn(axios, 'get').mockRejectedValue({});

      const hook = renderCustomHook();
      const getPosts = hook.result.current[2];

      await act(async () => {
        await getPosts();
      });

      const [posts, fetchState] = hook.result.current;

      expect(posts).toEqual([]);
      expect(fetchState).toBe(FetchState.ERROR);
    });
  ...
Here we are mocking axios with .mockRejectedValue({}) in order to throw an error when fetching the data.
For the last test case, we need to check whether we are getting the expected state when the API succeeds. This time the posts should not be an empty array. We will use the faker library again to mock the data for us. Here's the code below:
import faker from 'faker';

    ...

    it('should have expected states on api success', async () => {
      const res = {
        data: [
          {
            userId: faker.datatype.number(),
            id: faker.datatype.number(),
            title: faker.lorem.sentence(),
            body: faker.lorem.sentences(),
          },
        ],
      };

      jest.spyOn(axios, 'get').mockResolvedValue(res);

      const hook = renderCustomHook();
      const getPosts = hook.result.current[2];

      await act(async () => {
        await getPosts();
      });

      const [posts, fetchState] = hook.result.current;

      expect(posts).toEqual(res.data);
      expect(fetchState).toBe(FetchState.SUCCESS);
    });
  ...
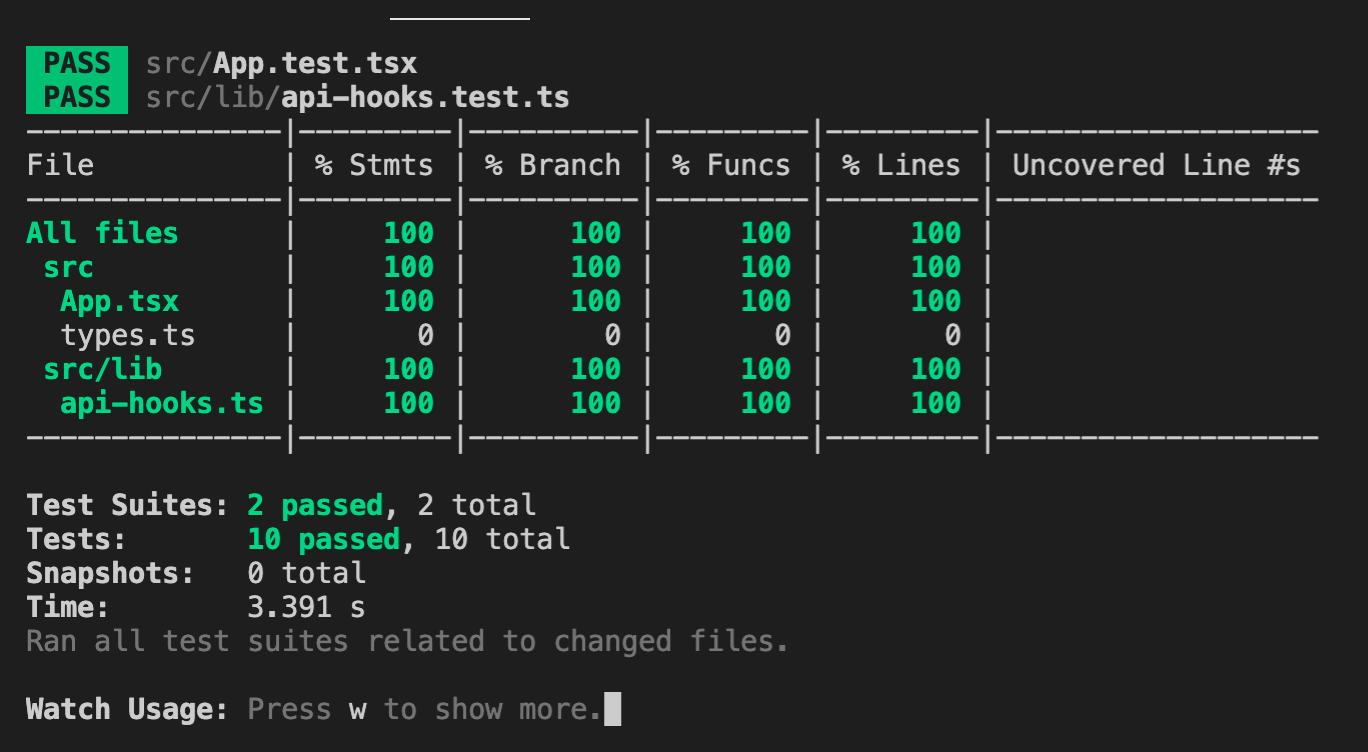
And there you have it!
By now, you should have achieved 100% test coverage and all looking green in your terminal just like this:
If you're up for a challenge, try creating your own custom API hook with the rest of the APIs by JSONPlaceholder here using what you've learned from this post.
In case you need the final code as a reference, this is the link to the GitHub repository.
Please don't forget to share this post if you find it helpful. Thank you ~